Getting bright, clear photos is important but there are many spots in our home that are a struggle to photograph. What drives me crazy is they are probably the brightest areas because they are near windows -- but they photograph horribly because of those windows.
I always end up playing around with aperture to try to get a decent shot and then editing to make it brighter. I lose the view out the windows in the the process though. They are usually blown out, but to get the rest of the photo to balance out it's all I can do sometimes.
Soooo. I bought this little tool years ago. It has sat in a drawer for all this time because I didn't take a few minutes to get it out and play around with it. Dumb. It was because of a cute cat photo I was trying to get that I finally tried it out. :) #catlady
It's called the Neewer TT560 Speedlite flash:

This thing ROCKS! It's around $30 and I can't even believe the difference it makes. I'll show you some of the photos and then share some more details about how to use it.
Here's the original photo I was trying to grab the other day:

Here's the same view with the Speedlite flash:

I couldn't believe the difference!
Now using a flash is usually a no-no for interior shots. It really messes with colors and creates shadows and is overall just not good. I never ever ever use a flash for home shots. Until now. :) This thing is pretty amazing.
Here's a shot of our powder room on the manual setting I normally use (these are all just candid shots I took to try it out):

Again, I usually increase the aperture or edit to brighten it up, but you lose some detail and there are always spots that are still dark.
Look at the difference!:

Shadows are reduced, detail is there and it's bright and clean. Love it. I didn't edit this photo!
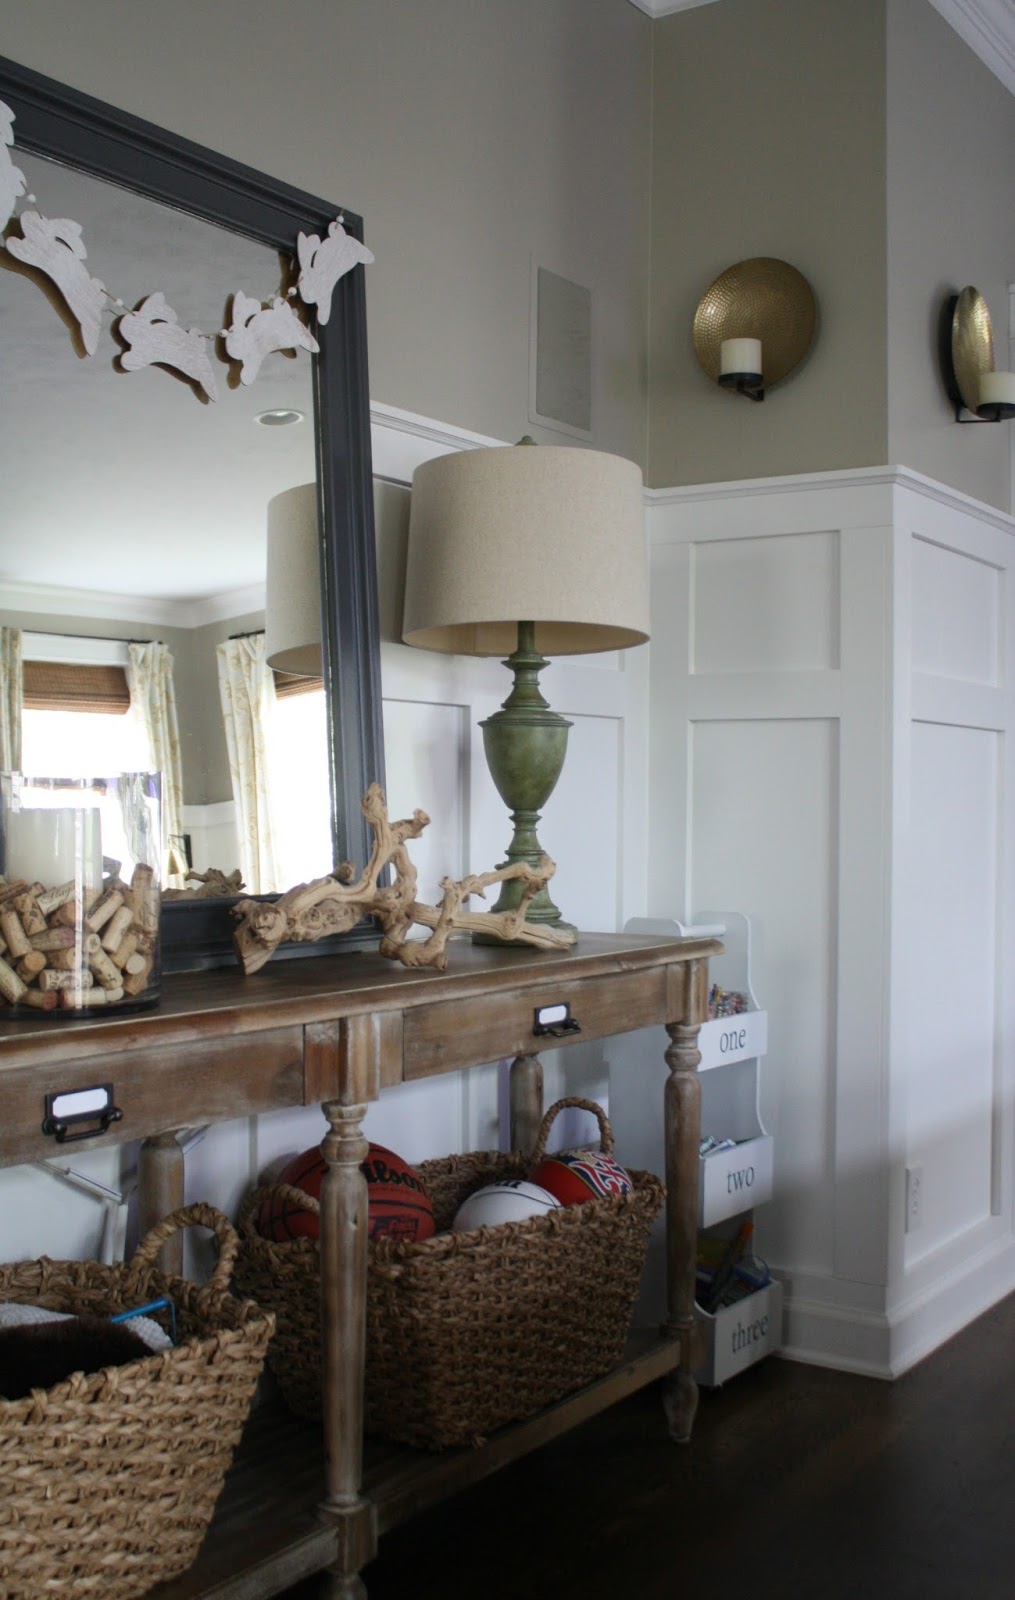
I love this spot in our kitchen but it takes a lot of editing to get it bright and the windows are always blown out with the regular settings:

Here is is using the flash attachment:

You can see out the windows! And details! Amazing.
It really helps to reduce shadows -- our sofa sits not far from this table so there's usually a shadow with a regular setting:
The Speedlite almost completely rids the photo of those shadows:

Remember when I showed you the daylight bulb I'm obsessed with now? This is like the daylight bulb for photos. ;) It looks like there's a skylight above, right?
It's a different look than I'm used to but I love it. I don't need to use it in every space but the difference really blows me away.
One of my favorite spots in our house is our window seat and it's tough to take photos of it:
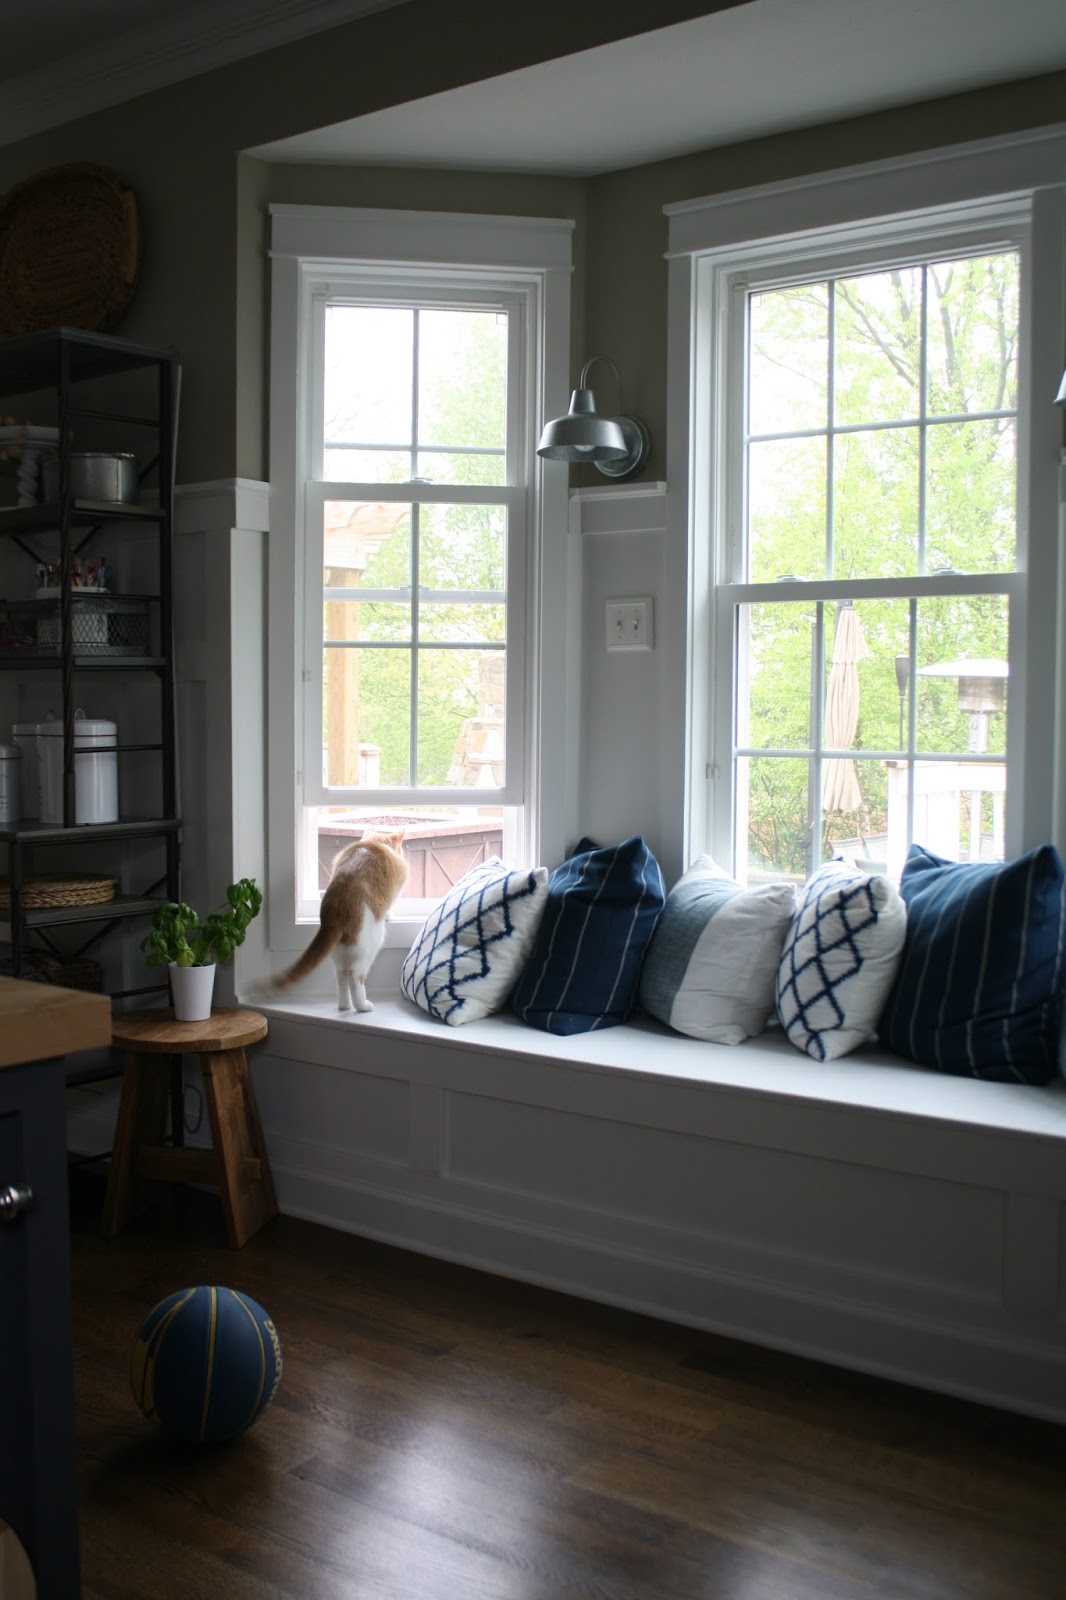
I like that you can see the trees outside but when that happens you can't see the inside!
The difference is crazy with the Speedlite:

I didn't even edit this photo -- that's unheard of for this spot. I love that you can see everything -- the inside and the outside! One of my favorite parts is how you can see the true color everything. That is the real color of our walls. (So similar to that daylight bulb I talked about.) Even the trees look more their true green.
When you adjust aperture you can lose some crispness to the photos. This flash allows for an even better look without losing quality.
I've heard of a Photoshop trick for years now to take photos of windows -- you take two photos and edit them together in a way so they aren't blown out. That's beyond what I want to do every time. This little tool does all the work for me.
Here are some things to know about the Speedlite:
- You can only use it on a auto setting. I only use manual so this is an adjustment for me. (But kind of nice at the same time.)
- The flash slides in to the top of your camera (I have a Canon) and is battery operated. Remember to turn it off when you're done. :)
- You can adjust the brightness of the flash -- sometimes it blows everything out so you need to see what works.
- You can move the flash component around and from what I've learned you should not point the flash towards your object (at least for these types of photos). The point of this tool is that it's a much bigger flash than what is on your camera, so it will give your photos an even more intense flash if you point it at your subject. Instead, point it to the ceiling. It bounces and fills the room with light which is what brightens everything up.
- You need to be careful with all white horizontal surfaces that will reflect that light from the ceiling. Our kitchen table in the photo above goes super white (which is it's true color) but it can blow out the photo a little because of that.
- As I said, the results take some getting used to -- they look more true to life than I'm used to. I won't (and don't need to) use it everywhere, but I LOVE the results in some of my harder to shoot spaces.
- The one I linked to works with Canon, Nikon and at least eight other brands.
I had to share this find with you, years after I bought it. Gah. I'm sure many of you have been using it -- as always I'm super on top of things. ;)
If you are a blogger, sell items online or just love photography I highly recommend this attachment. It's about $30 and totally worth it. Have you tried this tool? Anything else I need to know about it?
Affiliate link included for your convenience!


0 comments: