Thursday, January 26, 2023

Neutral Modern Vintage Bathroom Mood Board


A neutral modern bathroom mood board with a mix of metals and a touch of vintage! 


For years, I've wanted to completely gut and remodel our master bathroom.  It was one of the first rooms we had renovated and after 16 years could definitely use an update.  

Unfortunately, a major bathroom renovation isn't at the top of the priority list.  That doesn't mean I can't dream, plan and design a room that is full of everything I love......modern, vintage, texture, contrast, warmth, and a mix of metals. 


modern vintage neutral bathroom mood board

I thoroughly enjoyed designing this modern vintage bathroom and sourcing the perfect pieces to create a beautiful space I love!

NEUTRAL MODERN VINTAGE BATHROOM SOURCES 


FLOOR TILE-  I'm a little obsessed with the black terracotta floor tile and love that it can be laid in a variety of different patterns.

SHOWER TILE- I love the look of classic subway tile but prefer something with a little more texture and character.  The 3x12 white ceramic tile from Floor and Decor has the character I crave while also staying classic and timeless. 

VANITY- Last week, I shared a beautiful creamy gray vanity on Facebook, which kind of jump started this entire bathroom mood board.  I searched online for a similar colored vanity and found this one from Wayfair

BLACK SINK FAUCET- Simple, sleek, and in my favorite finish.

BLACK ARCH MIRROR- This arched black mirror adds a touch of softness and helps break up all the hard lines. 

BRASS AND GOLD LIGHT FIXTURE- The perfect mix of brass and gold!

WOOD STOOL-  Every bathroom could benefit from a small wooden stool.  They're practical and also make great plant stands. 

BATH MAT- A black and white dot bath mat for a fun addition. 

BATH TOWELS- Turkish towels are a favorite of mine and these striped ones are soft, absorbent and perfectly stylish. 

BLACK HOOKS- Modern matte black hooks for hand or bath towels. 

TOILET PAPER HOLDERModern matte black toilet paper bar to match the towel hooks

BLACK SHOWER FAUCET-  Who doesn't love a rain shower head?  

WOOD WALL PEGS-  For an extra touch of vintage, use an old wood accordion rack instead.

WOOD WALL LEDGE-  A warm wood wall ledge ideal for displaying art and small potted plants.  

ARTWORK- A framed black tree sketch and black and white swan add the perfect touch of vintage, while the gold frames help tie together the vanity hardware and light fixture. 

GOLD VANITY HARDWARE- I love mixing metals and these gold rectangular knobs are a great contrast to the rest of the matte black hardware. 

WALLS- White board and batten walls are an easy way to add texture and interest to a smaller space. 

CEILING- Did you think I would have a room in my home that doesn't include Iron Ore?  I've always wanted to paint a ceiling dark and a small bathroom is the perfect place.


shop our home


Click here to subscribe


Friday, March 31, 2017

Big bathroom renovation progress!

Hey all! I'm excited so many of you are taking advantage of the free Mrs. Meyer's cleaning set I shared earlier this week. If you missed it, head on over and take a look. It's only good through Tuesday so get it while you can. 

I'm thrilled with the progress on the upstairs bathroom this week! We weren't planning on moving forward on it quite so quick, but the contractors came over to give us a quote and then had some days available so we went ahead. 

Here's a reminder of where we started: 
Gray and blue boy's bathroom

I did a very inexpensive bathroom makeover with paint and a few new accessories last year. Before it was bright yellow from when our boy was born ten years ago. :) 

I've wanted to take that wall between the rooms down for years and have had the makeover plan in my mind all that time. I got a wild hair a couple weeks ago and just started knocking the wall down
How to remove drywall and studs

FUN times! It really was...I was so happy to start this. 

When I last shared it, I was at this point:
How to knock out a wall

I then finished up taking out the studs on the left and at the ceiling and cut back the pony wall a bit. 

I went back and forth on taking out the tub and surround and finally decided we needed to do it. I don't want to spend a ton on a new tub but I do want this room to fit in with the other updates we've made to the house. So the guys remove the tub and surround and I knew immediately it was the right choice: 
Removing tub surround and replacing tub

They put the insulation back in before covering the wall. :) 

We went with a slightly bigger tub -- 32 inches instead of 30 wide. I didn't realize we had such a tiny one in there! The new tub was $200, which is even cheaper than what I had budgeted:
Removing builder tub surround

They had to move some plumbing around to make the new tub work, but I love it so far!

I know there's no curtain and that's why it looks so much bigger...but man, does it feel bigger! I'm most excited about the little things -- I love that we added a niche for shampoo/soap:
Niche in shower

And I had them add a light over the shower -- best thing ever. We have the light on the fan but it still felt dark. 

The BEST part is that they framed the new window out. And we realized to do that correctly (to code with a header and the proper framing), we would have had to take the surround out anyway. We couldn't have done the window properly if we had tried to do it with that. 

So...it ended up being good thing. The window is just framed out for now (I need to order it this weekend), but man, I cannot WAIT to have more natural light in this room. Every time I walk by this dark hole I imagine how bright and airy it's going to be. 

Here's a reminder of what this room looked like a couple weeks ago: 
Wall separating rooms in bathroom

And this is it today: 
Taking down a wall in a bathroom

I'll be making shower curtain that will hang from the ceiling -- I think that helps to make it feel even more open. 

Next steps for me are to frame out the pony wall and small wall around the vent and get it ready for drywall. Then I'll take the vanity out, pull up the vinyl (and put down the correct backer board) and tile the floors. I hope to have the tile done two weeks from now. 

I've only looked one place so far (The Tile Shop when I was picking up the niche for the shower), but I fell in love with these for the floor:
Tile that looks like linen

I'm going to keep looking but aren't those awesome? Love the linen look.  

After I finish the floor tile we can add the plumbing for the additional sink and I plan to build the vanity. Have you seen how expensive vanities are? It's crazy town. My goal is to have at least some of the bathroom functioning most of the time. Right now the sink and toilet are fine. While I work on tile none of it will be usable for at least a week. 

I think we can have this bathroom nearly done in three weeks, but I'll be doing most of it, so it depends on how quickly I can get this stuff done. I'll take you along for the ride as always! 

I'm taking a few days away to spend with family next week but I'll be back at the end of the week! Have a wonderful weekend! 


Wednesday, March 15, 2017

Another door goes black! (And how to do it.)

Hey all! I'm back today with a quick post about a project that's not so quick. ;) As some of you know, I have painted most of the doors in our home in black. I haven't started upstairs yet (I know it's going to look so good!) and I thought I had finished them all on our main level and basement.

I keep forgetting about a couple -- one in our powder room and one in the basement laundry room. I'm determined to get those done before I move upstairs.

I'm going to try spraying them when the weather gets nicer, but of course this week we have temps in the 20's and snow when the past two months were 60's and 70's. 😡 So...I had to work on it inside.

I think this makes SUCH a big difference and it's not a hard project at all, but it does take some time. I've shared how to paint your doors (interior and exterior here) and you MUST find out if they are painted with oil or latex paint before you start. Most doors are painted with oil so if you paint without primer, it will come off later. Sometimes it will flake, sometimes it will peel. But it will come off and really annoy you. ;)

So I always prime our doors first:
How to paint doors

The great thing is there is no need at all to sand -- just clean it well before starting. And I don't take mine down when painting by hand -- there's no need. (You'll need to tape around hinges if you will see that side of the door.)

I go into detailed instructions on how to paint a door in that link above, but this is the primer I use: 
BIN primer for painting doors

Because I go dark I have this tinted to a gray. This primer is awesome and is my favorite -- it's super thin and easy to apply, but watch for drips. A small quart of this will last a very long time, you don't need much. It also dries incredibly quick so that speeds up this process a bit. 

Our doors are all painted in Graphite, it's a very dark gray instead of super black. I have it mixed in Sherwin Williams paint just because I love their stuff. This enamel paint is what I use for our doors: 
Best paint for doors and trim

I use eggshell or satin but most prefer shiny doors, so the finish is your preference. 

One coat of primer, two coats of black and some touch ups and it was done: 
Black door white trim

I am totally in love with the look of black interior doors. Every time I do this I fall in love with them all over again! LOVE!:
White bathroom with wood floors and black door
Here's more about the powder room makeover and how I planked these walls (that's what us old folks called it before "shiplap"). We went with hardwoods in here to work with the rest of the main level and I have loved them. 

I used a piece of art our son painted as the inspiration for the room -- the accent colors all come from that art: 
White bathroom with wood floors and black door

The white door looked absolutely fine, but after some time I knew I wanted it to match the rest of our interior doors. Black doors are a classic and will never go out of style: 
Black interior doors

Have you painted your doors a color? I love any color on a door -- blue and gray are another favorite of mine. They add dimension and interest to your home for very little money! 

If you'd like to see what this contraption is behind that black door, you can see it here
DIY laundry chute


Wednesday, February 22, 2017

My favorite hidden storage in the kitchen!

Hello and happy weekend! It's Friday the 13th, the full moon was yesterday and we're expecting an ice storm tonight. Good day to stay inside I say! 

This is one of my very favorite little details of our home and I can't believe in nine years I've never shared it with you! At least I don't think I have? I've been at this a long time folks! 

This organization idea is hidden away and you'd never even know it was there. We have them in the kitchen and master bath: 
My favorite hidden storage for the kitchen and bathroom

Any guesses? I don't even remember picking these out when we built our house -- if I remember right they came as a nice surprise to us when we moved in. 

They are called tip out trays and they allow you to use that small space behind those upper, faux drawers: 
Tip out trays for hidden storage in the kitchen

They work with nearly all drop in or undermount sinks. And of course with sinks that sit on top of the counter in bathrooms. When we installed this sink years ago with our old countertops I couldn't use the trays because there wasn't enough room. But when we got the granite they must have moved the position of the sink back just a bit because they work fine again! 

They are absolutely AWESOME for the little stuff you need to access daily:
Hidden storage in the kitchen for small stuff

We used to keep our sponges in there until I found these that I love -- they won't fit inside. But regular sponges fit fine and tons of other random stuff will as well. 

In our bathroom we use them for our toothbrushes, toothpaste and flossers: 
Hidden storage in the bathroom

We each have one in our bathroom and I plan to add two more when I work on this room sometime in the next couple of years. They are so convenient and easy to access! 

It wasn't till about seven years ago or so that I noticed they had started selling them in the store -- I've seen them at Lowe's but the best price I've seen for them is on Amazon. (Make sure yours come with the hinges if you buy online!) You can also just buy the trays -- when ours didn't fit with our new sink I just took the trays out and attached them to the back of the cabinet doors. Still great storage! 

If you're handy you can install them yourself, but they do take some patience. To install them where there are none, you'll need to lay inside the cabinet to remove the drawer front and then install them. :) I had to remove the kitchen trays when I painted our cabinets and took photos of them to remember exactly how to reinstall them. 

I highly recommend these hidden storage trays for little stuff you use every day -- I think they're especially helpful in the kitchen! Do you have these hidden gems in your house? We love them and plan to add more! 

Have a great weekend and if you are getting the ice as well, be safe!

Affiliate links included for your convenience! 

Thursday, February 2, 2017

Eleven stunning bathroom transformations!

I'm so excited so many of you are excited about our upcoming bathroom makeover! You get me. :) If you missed it, you can see how I took down a wall in our son's bathroom...something I've wanted to do for years now.

I finished up with the demo Wednesday and love it even more. The extra little bit I took down made a big difference. I also cut back the pony wall -- totally keeping it, loved your thoughts on it -- so it widened the opening back to the tub room even more. It already feels like it should have been like that all along.

Since I've got bathrooms on the brain and I'm currently trying to finish up my design plans for this one, I thought it would be fun to share some of the prettiest bathrooms around blogland for inspiration. Be sure to visit these bloggers at the link below the photos.

I have to start with a stunner. I mean, come on. Courtney's bathroom is drop dead gorgeous:
French cottage bathroom transformation

You know what's funny? It's timely because the gilded touches remind me so much of Beauty and the Beast. This looks like it could be Belle's bathroom. ;) 

I notice a trend when I'm drawn to certain bathrooms -- I love a bright white space with a darker wall or vanity as contrast. I love contrast so I shouldn't be surprised. 

I loved this transformation from The Handmade Home: 
Blue bathroom before

Penny tile floor in bathroom with gray vanity

The floor and the simple dark gray vanity are on point!

This bathroom looks completely different with some simple changes -- white paint is the game changer in this room!:
Budget bathroom makeover

Budget bathroom makeover with paint

My favorites -- the dark navy vanity with rustic hardware combined with the wood framed mirror. 

Cyndy sent me photos of her bathroom reno and my mouth dropped open when I saw them. She shared them with me because they opened up their two-room bath as well: 
Two room bathroom makeover

Gorgeous bathroom makeover with dark walls

Holy cats, right? I mean, what a difference! Opening up the tub to a shower made a big difference too! I love the dark grasscloth walls (yummy) and that tile floor!

I've always loved Christina's small bathroom makeover: 
Dark walls subway tile bathroom

Again, don't be afraid to go for dark walls -- I think bathrooms are a spot you can do something more dramatic and get away with it.

This transformation was pretty big too -- love the light gray and wood tones together:
Bathroom renovation before

Light gray bathroom with wood accents

What a beautiful, bright, updated space!

I didn't even realize Jen's bathroom was in the basement until I read more: 
Furniture as bathroom vanity

I adore that cornflower blue on the small vanity! What a great way to reuse a piece! 

This makeover Chris did years ago is still one of my favorites: 
Coastal bathroom before

Coastal bathroom makeover

My favorites -- the black vanity (love) and the light blue ceiling. :) 

Rhoda's bathroom underwent a big transformation, but the shower is my favorite: 
Tearing out bathtub with surround

Black and white tile design in bathroom

I LOVE how she combined the black and white different tiles here -- so classic. If we could get away with doing a full shower and no tub I'd do it. But for this house and resale someday it's not the best idea. 

A new vanity made ALL the difference in this makeover: 
Sixties bathroom renovation

Dark gray vanity in bathroom

My love for dark gray will never waver. Love it. 

And one of my absolute favorites of late to wrap up this list -- my friend Beth just completed a gorgeous makeover of their master bath. Check out the before and after!: 
Huge bathroom renovation

Modern farmhouse bathroom makeover

There are so many beautiful details in this room, you have to check it out at the link! Wow. 

These get me even more excited to keep the progress going in ours! I love every one of these!

Have a wonderful weekend my friends! :) 


Monday, September 26, 2016

Master bathroom reno plans!

Hello there! I hope you had a lovely weekend! We spent the day yesterday at IKEA and Kings Island -- a little something for me, a little for our son, a fun day for all. :) I've been eyeing an item at IKEA for about a year now and I went head and purchased a couple for a future renovation. I don't usually buy that far out but I'm getting excited about some changes I want to make next year. 

I've mentioned that we don't plan on tackling our master bathroom for another couple of years. I know it will be a costly project (even with DIY projects, bathrooms add up) and I want to focus on finishing up another bathroom and other rooms next year. 

But for the first time ever, I'm actually inspired to do at least a little something in this space! I don't start a room makeover until I see the vision of what I want it to be in my head. It's a weird thing for me -- I just can't go into it unless I know exactly how I want the end result to look. Just recently I've been finalizing ideas in my head and decided I will most likely go ahead and tackle some of this room next year. 

It will be in phases -- the vanity area, toilet room and paint will be first. Those alone will be a huge undertaking. The tile and tub area, ceiling treatment and more lighting, and then shower makeover will happen later on. So it will take a couple of years to finish up the whole room but I'm fine with that. This way we can still use the bathroom during the makeover as well. 

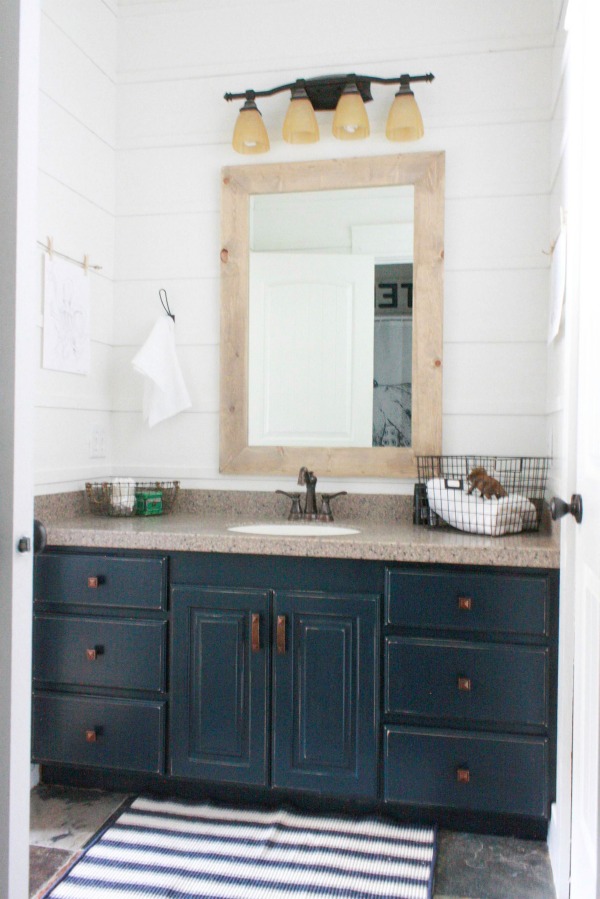
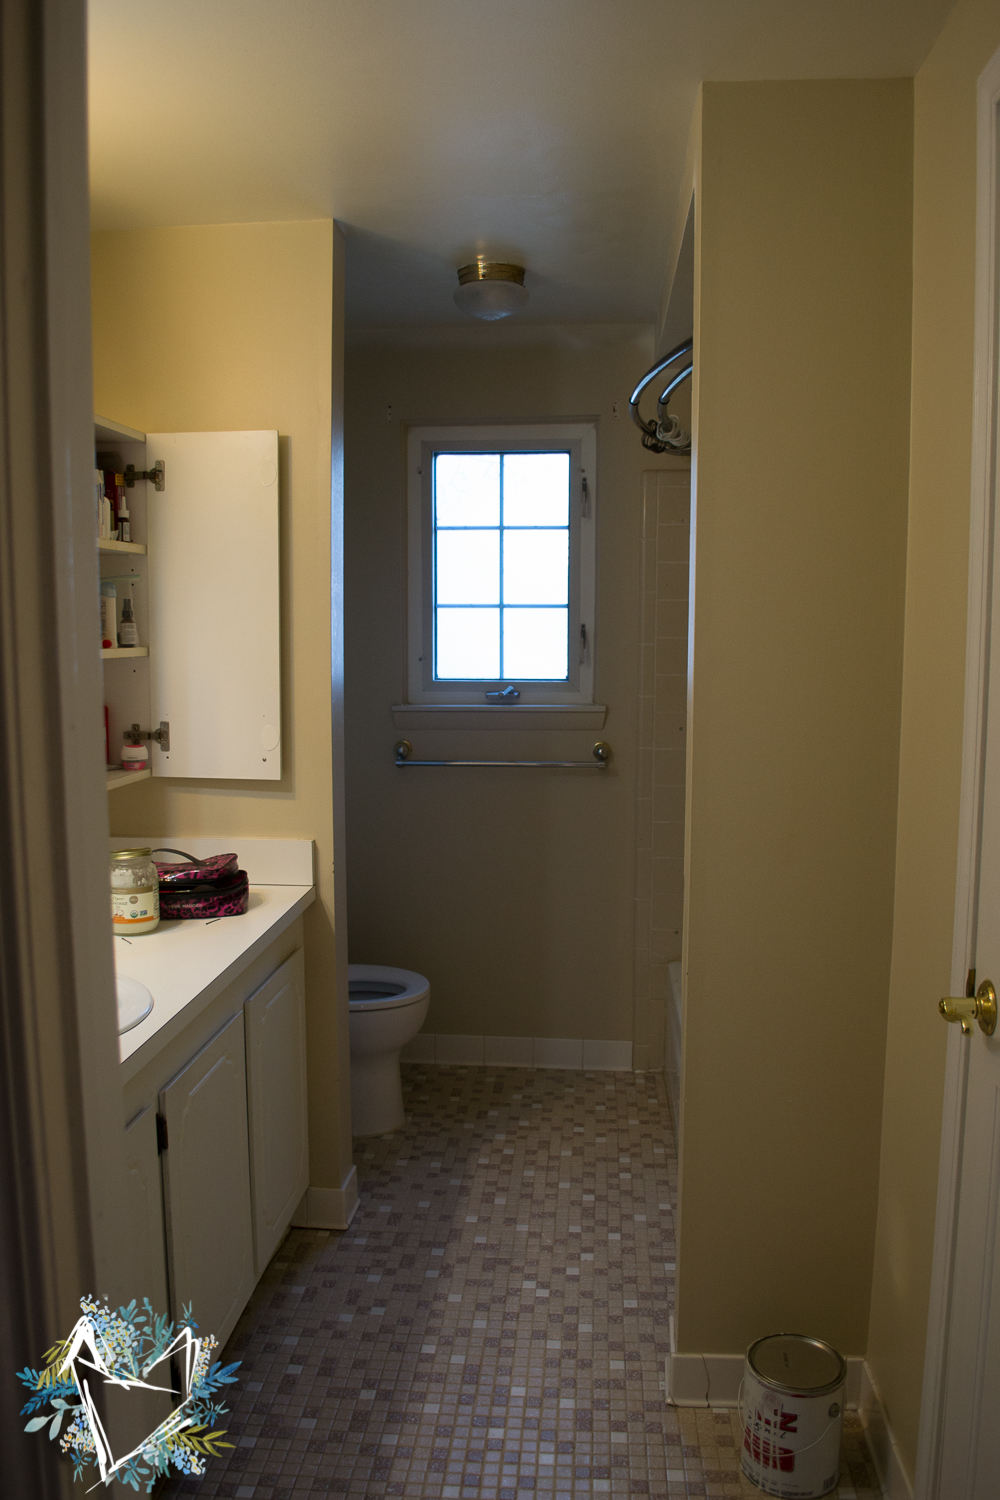
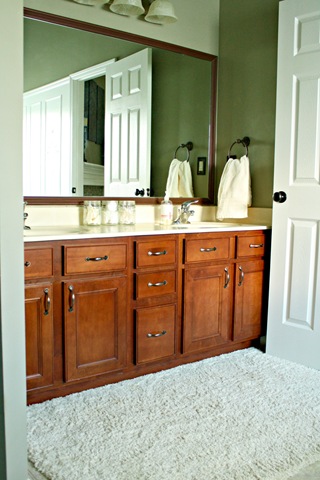
My big project will be our vanity area. I picked out all of the finishes in this room years ago but of course my style has changed since. I've never been in a hurry to do this room because it's certainly nice enough and it's really roomy. It functions well so it's just not been high on the list: 
Tornado Watch paint Lowe's

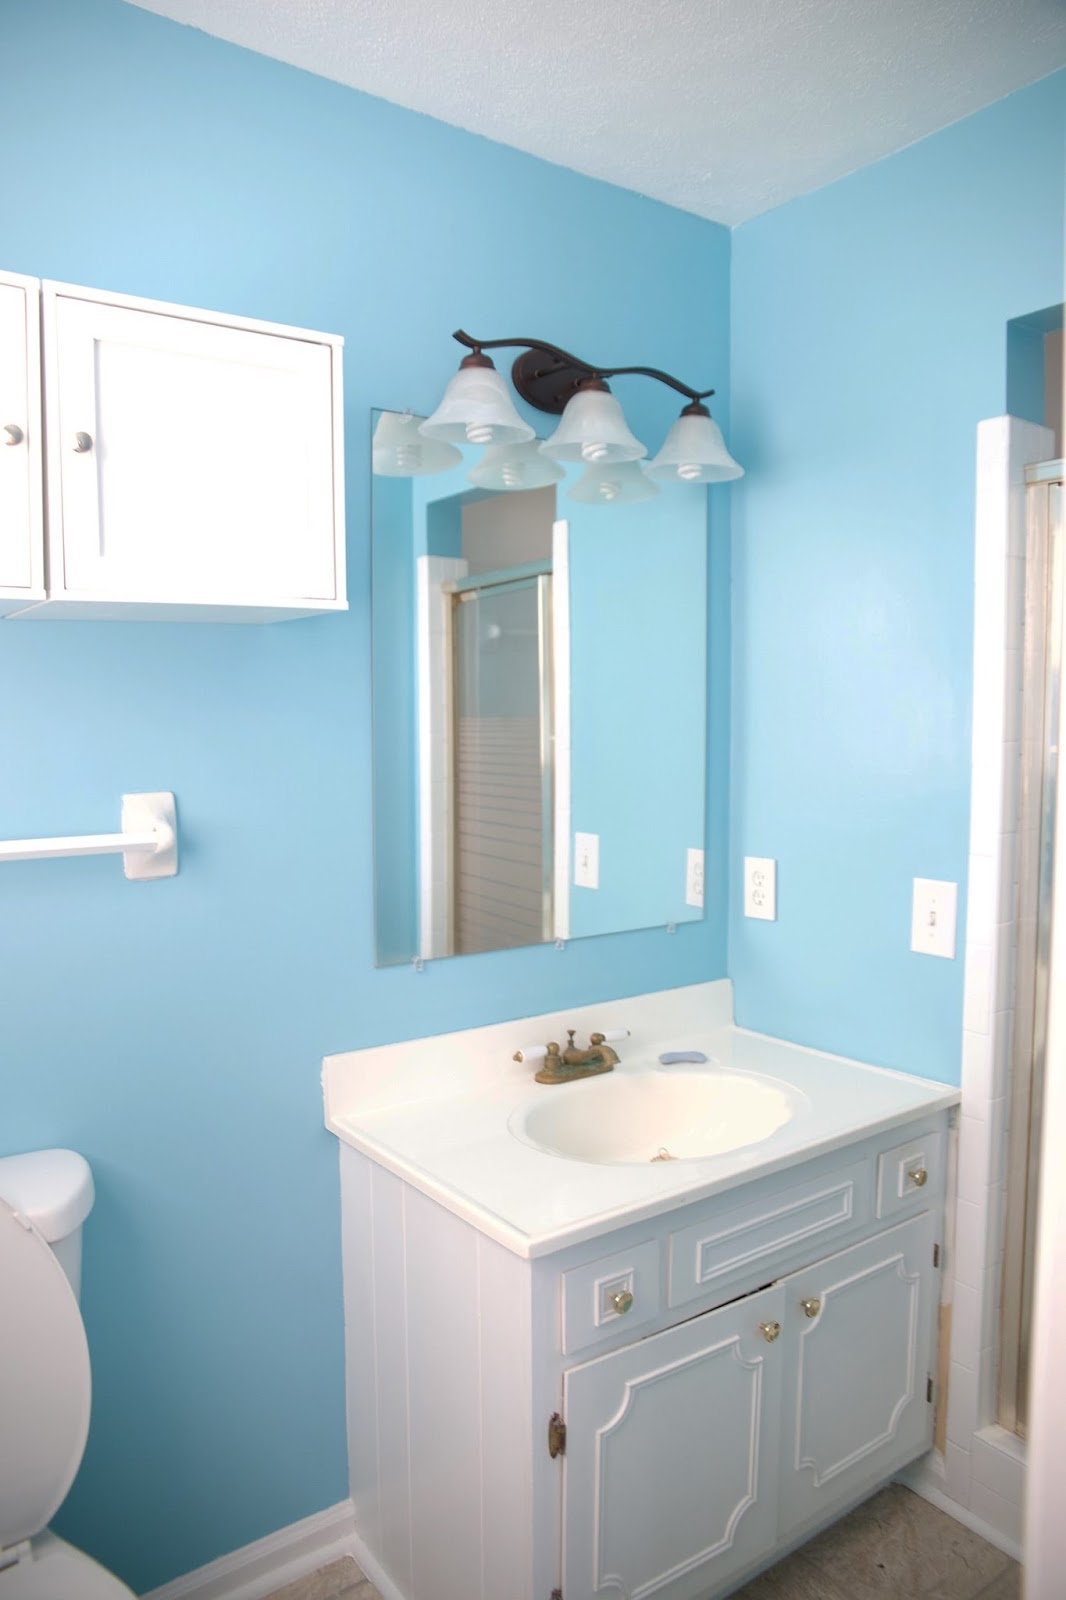
(By the way, the walls aren't THAT green -- the lighting was not great in this pic. The true color is in the photo below.) The only thing that drives me crazy about our bathroom is the height of our vanity. I mean, did we get taller as a population over the past 12 years or what? It's SO very low. I want to raise it up at least five inches, maybe more. I dream of the day I can lean over to brush my teeth and not feel like I'm touching my toes. 

As I said before, the finishes are just not me anymore -- I was really into the dark bronze for so long so every light switch, outlet and all of the hardware is my old beloved…oil rubbed bronze. :) Remember when I sprayed everything that color? I was obsessed! I still love some ORB but in smaller doses:
bathroom makeover ideas

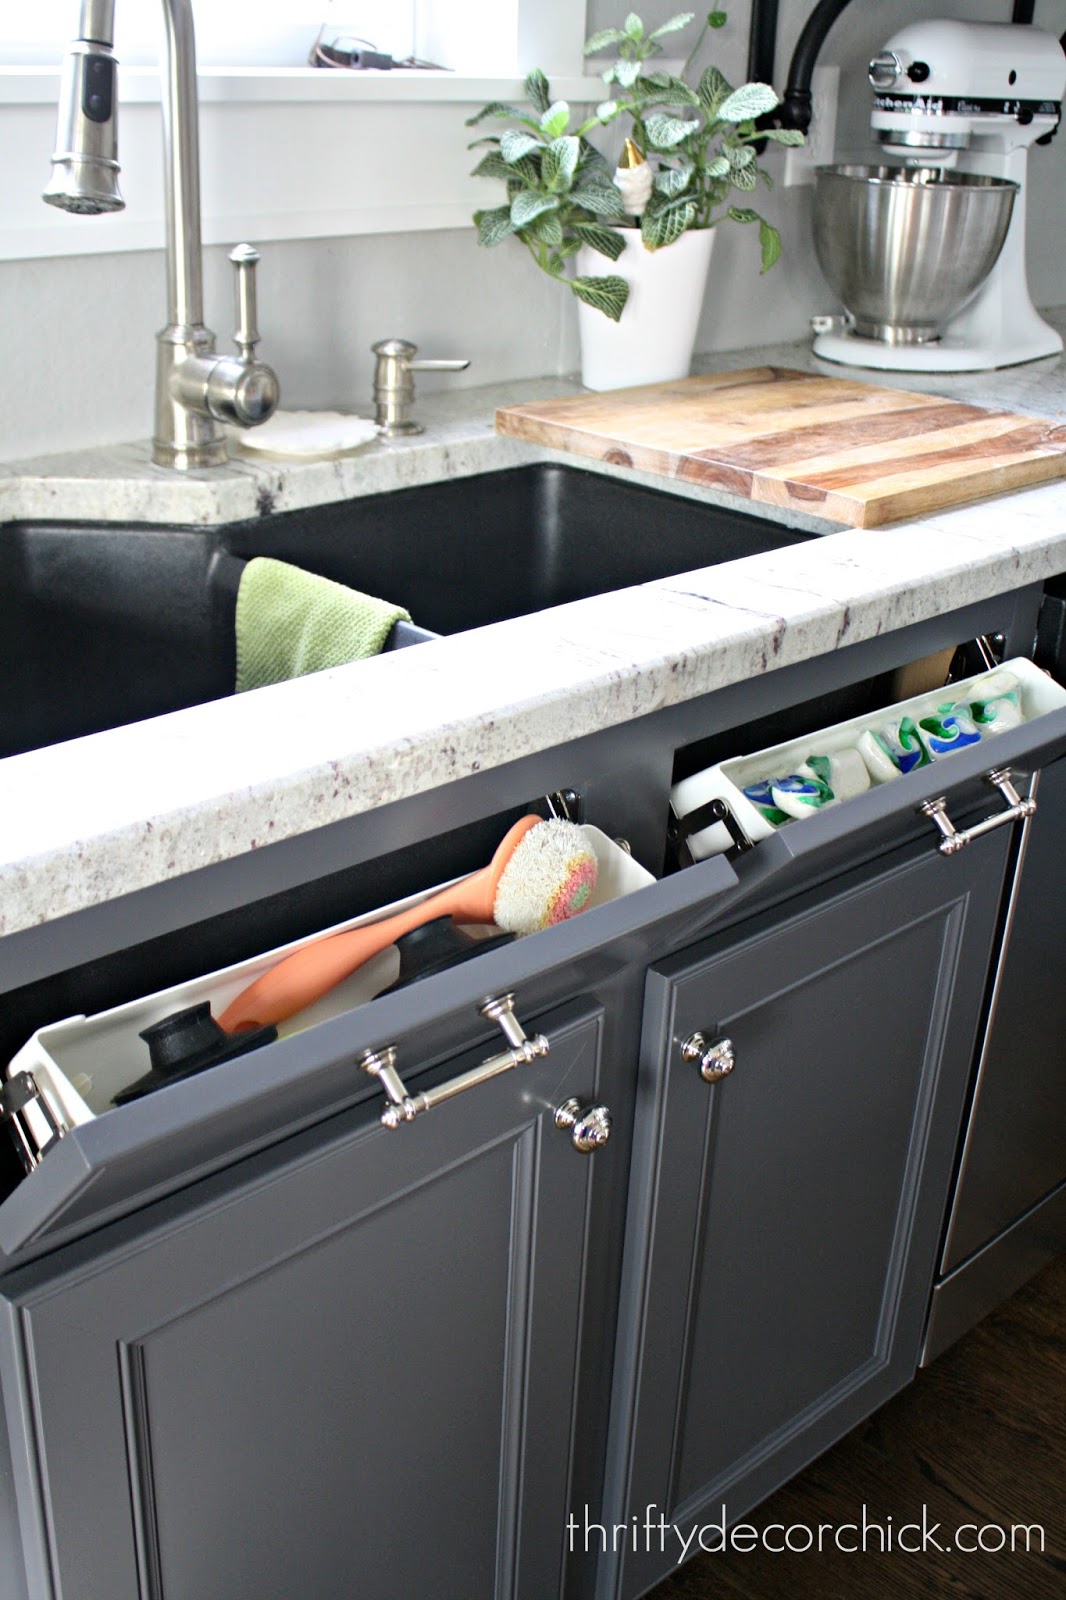
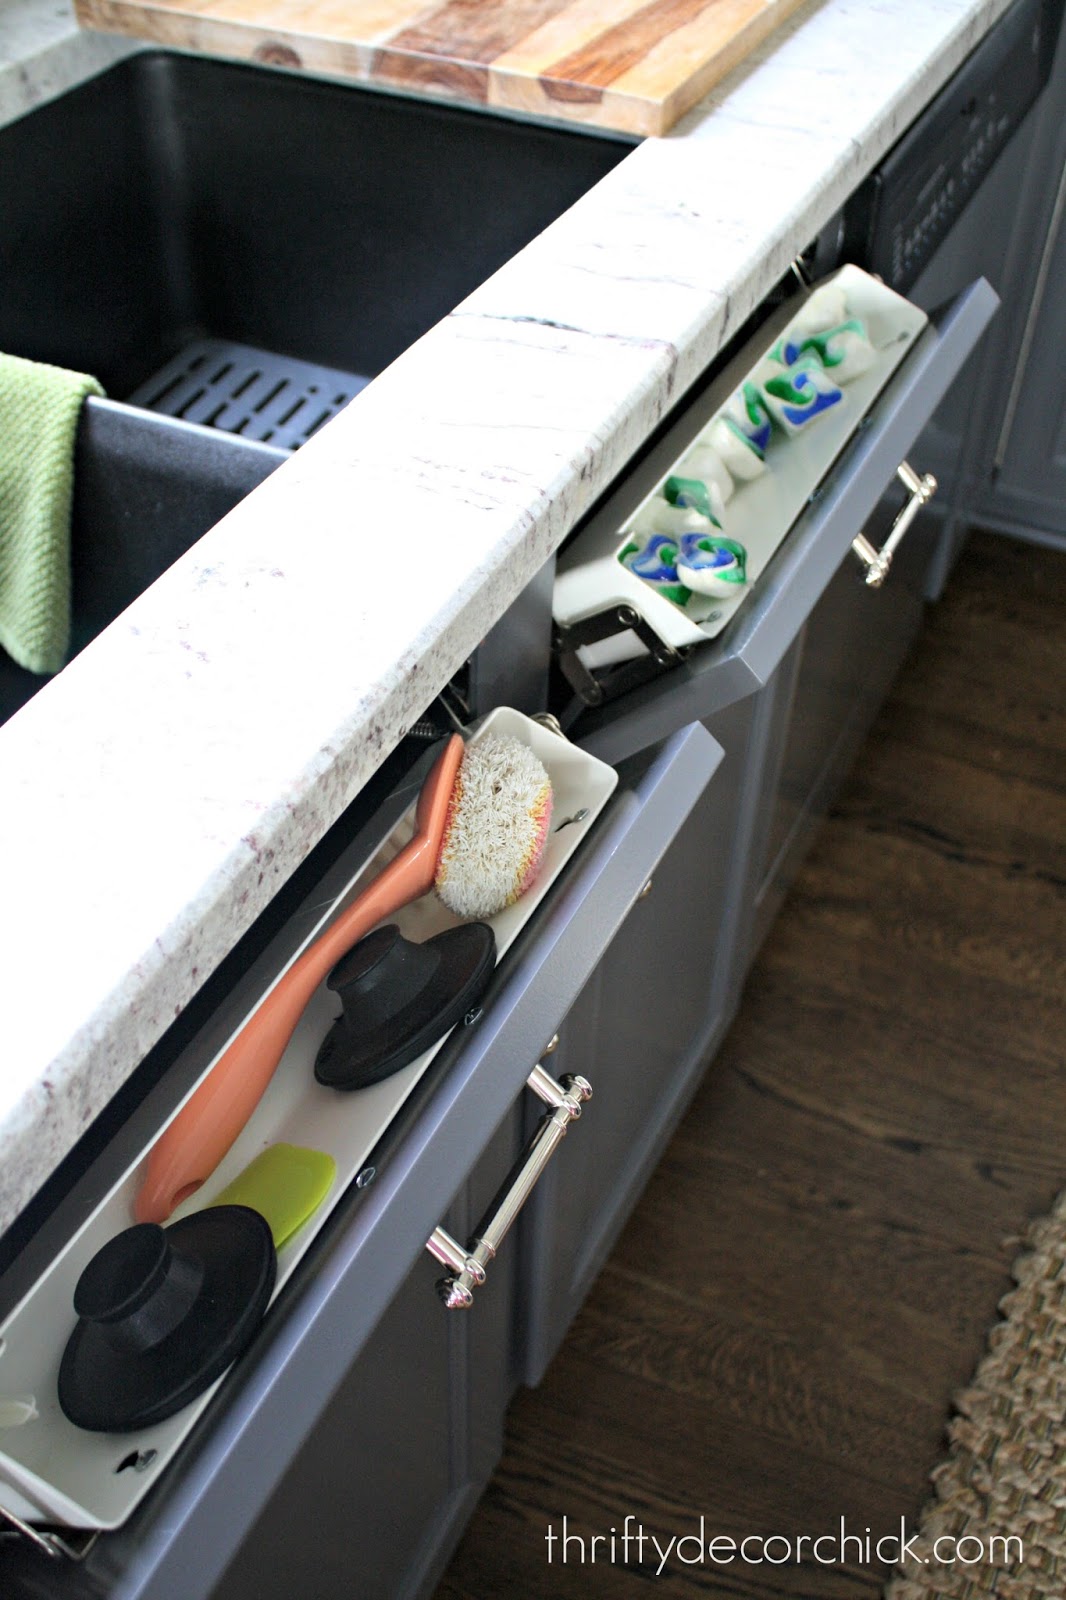
We have tons of storage under the sinks but rarely use it because they are so low and awkward to get to. I may add a skinny storage tower in between the sinks for our everyday items. (I want to get rid of the shelving up there.) My hope is that having the vanity up a little higher will make it easier to access underneath so we won't need any other storage on top. 

So this beauty is what I picked up yesterday for this area:
round mirror from IKEA

It's the Stockholm mirror from IKEA and I ogle it every time I go in. I love the wood trim and the size is quite large -- it may be too large. I got two, one to go over each sink. I have to decide if I want to add sconces by the mirrors or just do smaller lights above -- we only have one light there right now and I'm looking forward to more light for sure.

I do plan on replacing our inexpensive countertops and sinks with something else but not sure what yet. To use these mirrors in our bath we may have to move the plumbing over because the sinks are just a tad too close to the wall for these to work as they are now. Not sure I want to spend the money to do that so these may go in the Bub's bathroom instead -- I told you about my plans for that room here. (I do plan on getting that room done next year.)

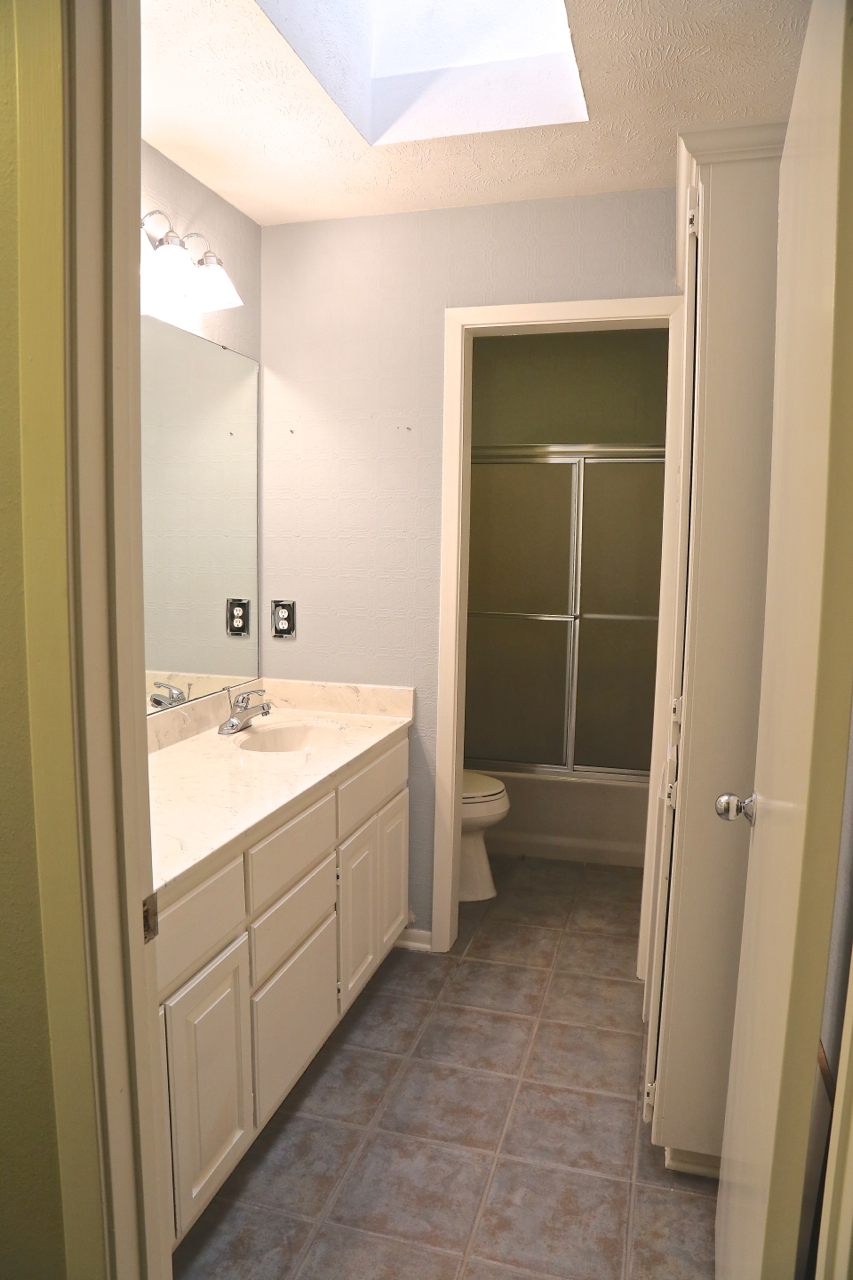
I should have taken a photo of the walls in our bathroom so you can get an idea of why I've only painted this room one time. Yikes, they are tall. I honestly can't believe I did it last time since I'm not a big fan of heights. They go up to roof height and we LOVE how open it makes the whole room feel.

I'm planning something lighter for the walls, and I may go with this Sea Salt color:
Sea Salt by Sherwin-Williams
Credit: Studio McGee

I see it a lot and it's a lovely blue green, but it may go too green for me. I've had our gray green walls in there for too long now and don't think I want any green tones at all.

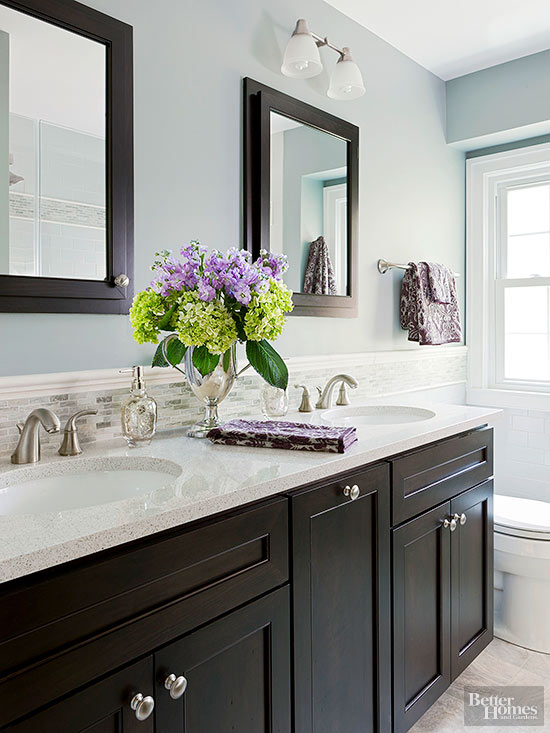
The vanity will most likely go black. I have yet to paint our interior doors upstairs but they will all go black like the rest of the house. I'm considering a sliding barn door but I think it may be too bulky.

Looky what I found -- a dark vanity with a similar mirror to what I picked!:
dark vanity brass hardware round mirror

I love when I get validation about the ideas in my head. ;) 

Here's a look at a similar wall color (this one goes more blue than Sea Salt) with the black vanity: 
black vanity blue walls
Credit: BHG

I think that is such a soothing, pretty combo with the light blue and black!

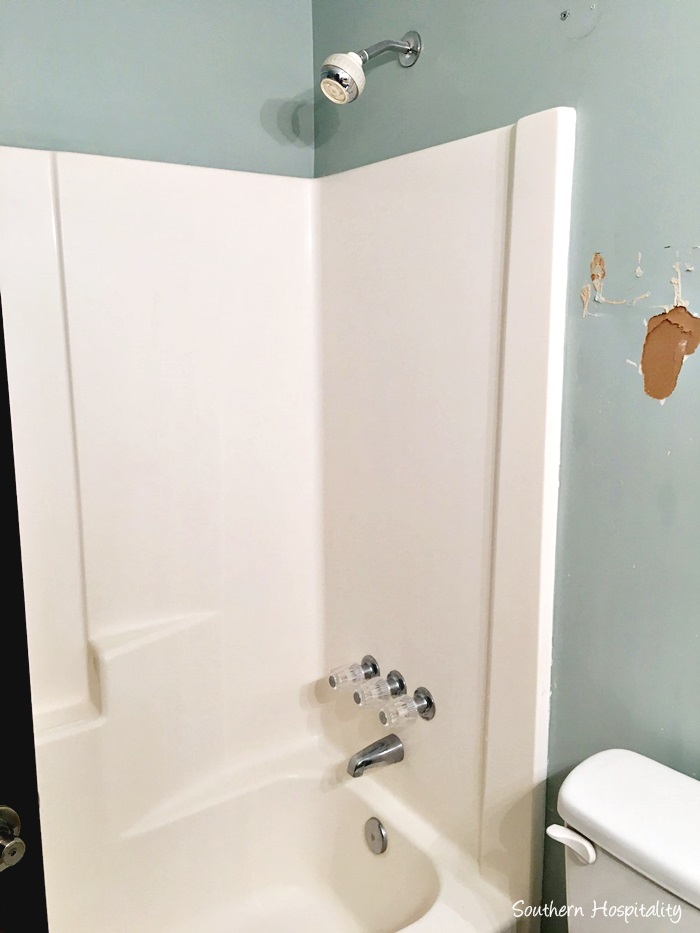
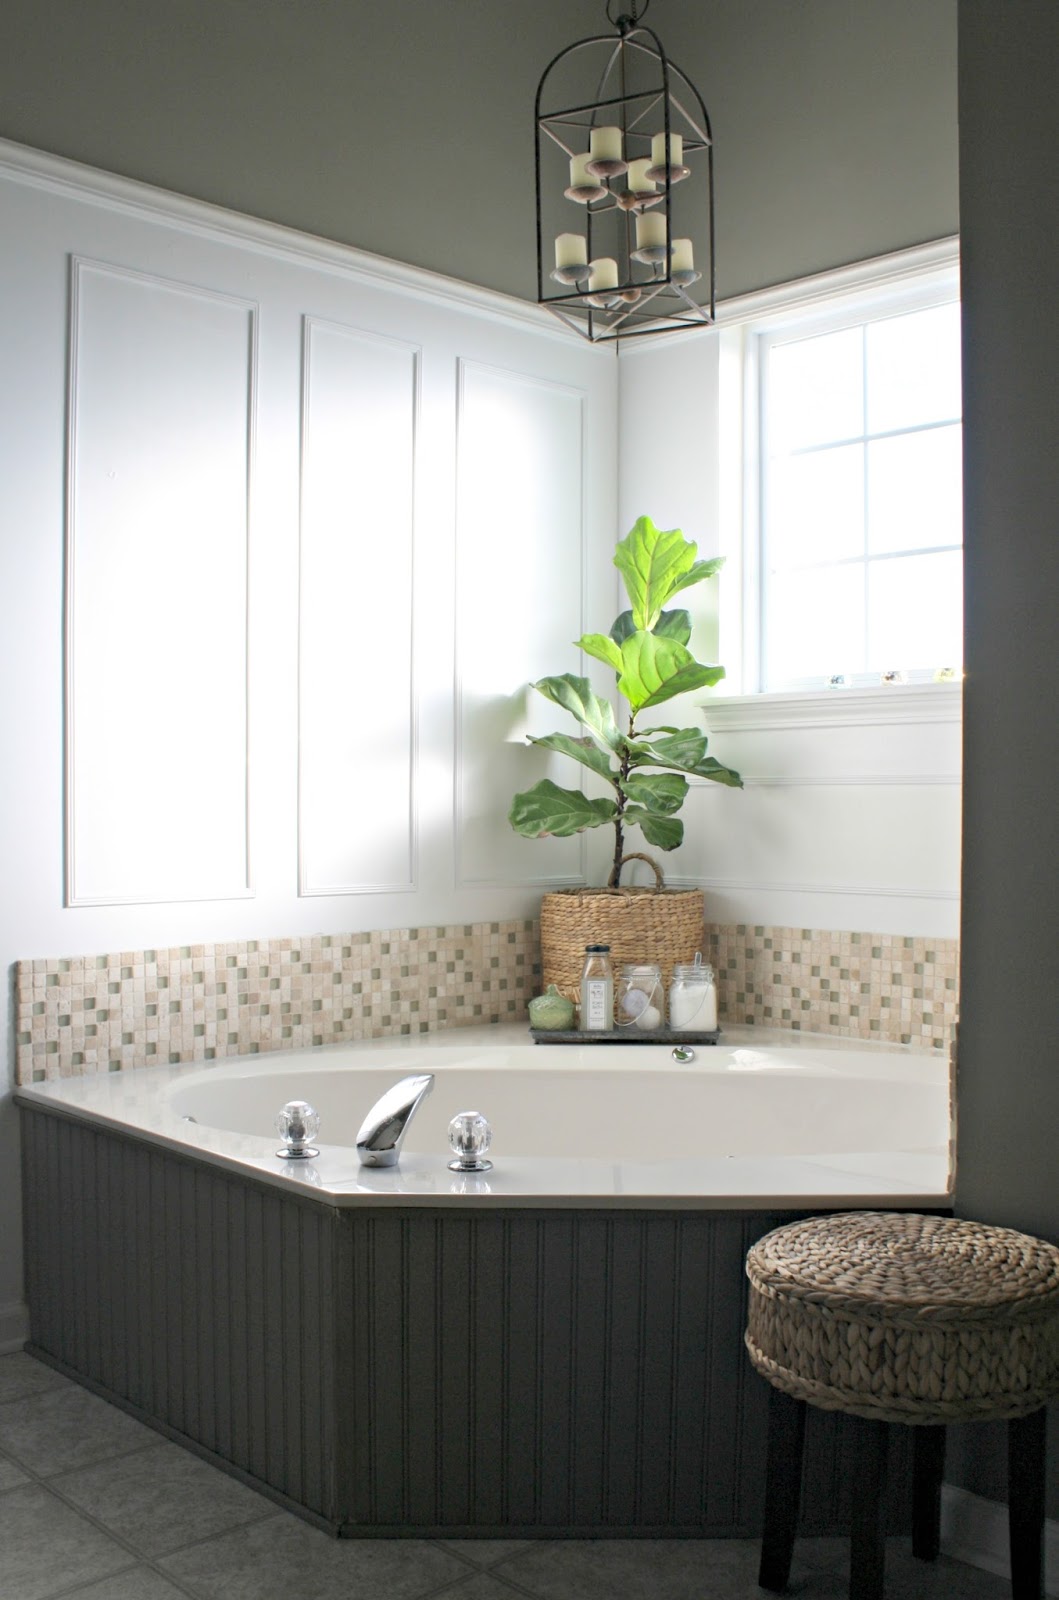
Earlier this year I made some simple updates to the tub area (during another no-spend month!) and this area will stay the same for now, other than perhaps a new tub faucet and of course the new paint color: 
corner tub design and decor

I'm getting really excited about finally updating this space! So much so I'm forcing myself not to pick up a paint brush and get started immediately. Other projects are calling my name first. :) 

I hope to share a room update with you later this week -- I'm so thrilled with this little makeover and can't wait to show you! 

Have any of you tried Sea Salt? Is it green in person or more blue? 

You can see our smaller bathroom makeovers in the basement, powder room and small changes in the Bub's bath that made a big difference here: 

simple bathroom updates that make a big difference

planked white walls in bathroom

blue green bathroom makeover