Monday, December 12, 2022

Easy Vintage-Inspired Santa Garland


Learn how to decoupage paper napkins into an easy vintage-inspired Santa garland!


The other week, I ran into Marshall's looking for a particular Christmas gift and stumbled upon the most adorable Santa paper napkins.  Apparently, I'm all about vintage Santas this Christmas.

They had the cutest jolly faces and vintage-inspired vibe that I couldn't resist buying a pack.  I wasn't exactly sure how I was going to use them, but I knew I had to have them. 

Once I got home and took a look at a few of my craft supplies, I realized the napkins would be perfect for a decoupage project!

DIY decoupage Santa garland

WHAT IS DECOUPAGE? 

Decoupage is an art and refers to decorating an object with paper.

WHAT IS THE BEST GLUE TO USE FOR DECOUPAGE? 

There is a lot of different craft glues out on the market, but Mod Podge tends to work best for decoupaging.  It's thinner than Elmer's glue, dries clear, comes in multiple finishes, and is super easy to work with.  


SUPPLIES NEEDED TO DECOUPAGE PAPER NAPKINS

- Paper napkins (I found my Santa napkins at Marshall's)
- Saw 
- Sander or sandpaper
- Scissors
- Hole punch (I used a 1mm hole punch)
- String or jute twine 

HOW TO MAKE A DECOUPAGE PAPER NAPKIN GARLAND 

There are a variety of different materials and surfaces you can decoupage.  Today, I'm going to share how to make an adorable vintage-inspired Santa garland using paper napkins and cardstock. 

vintage-inspired Santa garland

STEP ONE: CUT AND PEEL APART NAPKINS

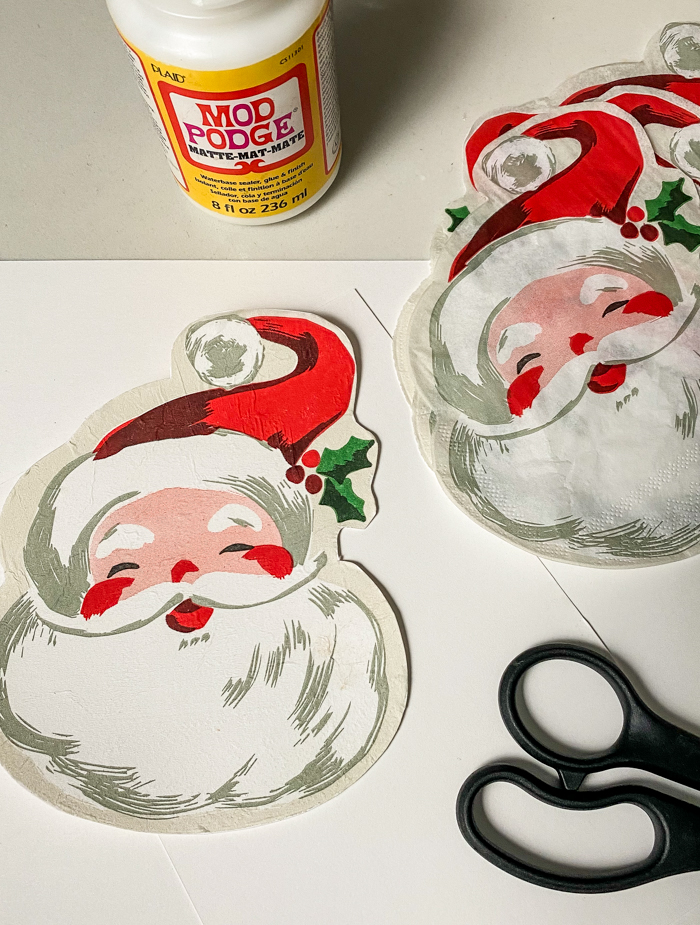
Cut napkins into the desired shape then peel apart the layers.  Most napkins are 2 or 3 ply and you'll only be using the top printed layer of the napkin.

The Santa face on my napkins was already pretty much cut out, but there was a small area that I needed to trim in order to separate my napkins. 
cut and pull apart napkins

STEP TWO: APPLY MOD PODGE TO SURFACE

Apply a thin to medium layer of Mod Podge to the cardstock, slowly place the napkin over the Mod Podge, and carefully press into place.  Gently pat the napkin to remove any unwanted air bubbles or wrinkles.  

I liked the vintage Santa image on my napkin and felt imperfections would just add to the vintage vibe, so I wasn't overly concerned about a completely smooth finish.  

apply mod podge to card stock

STEP THREE:  CUT OUT THE DECOUPAGE IMAGE

Allow the Mod Podge to dry for about 20 minutes then cut out each decoupage Santa image. 
cut out decoupage Santa

STEP FOUR: PUNCH HOLES AND STRING IMAGES 


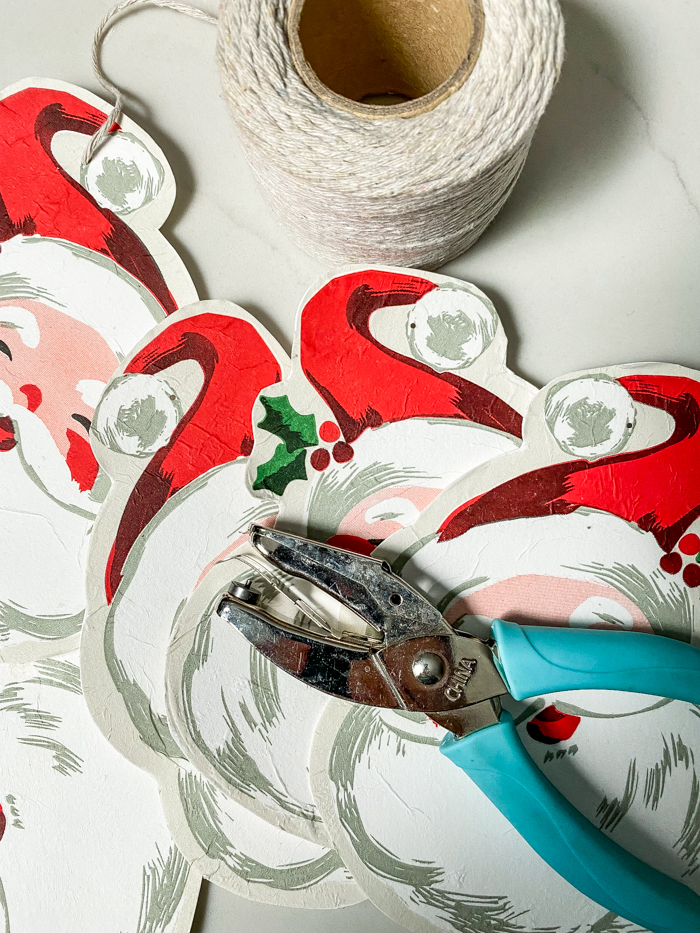
I prefer the look of a very small hole, so I used a 1mm hole punch to punch holes in the top of each of my Santa faces then strung them together using white cotton string.  

TIP: Make a loop at each end of the string for easy hanging.
Punch hole in each decoupage Santa

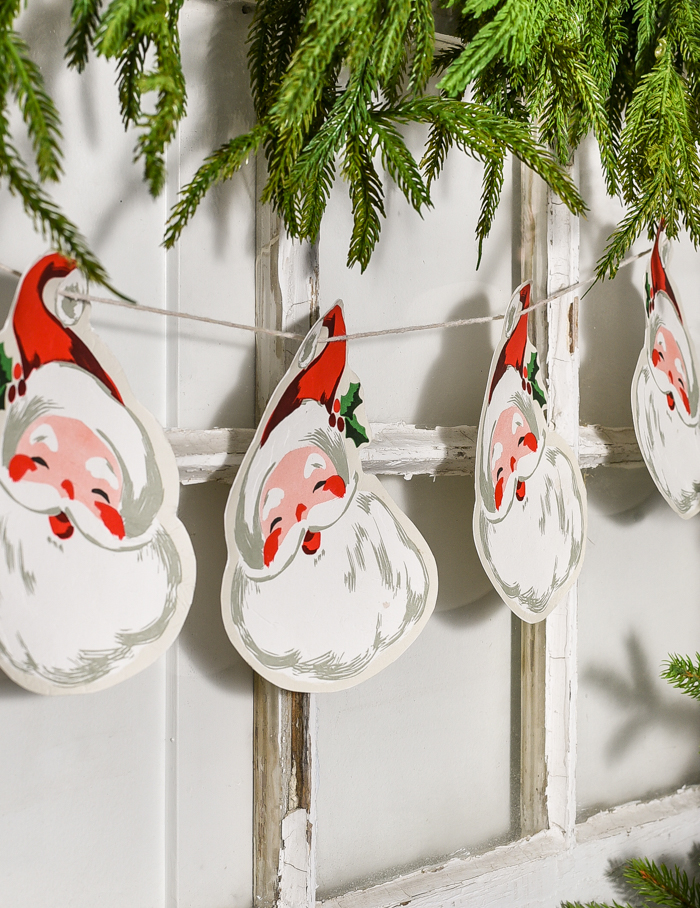
string Santas to make garland
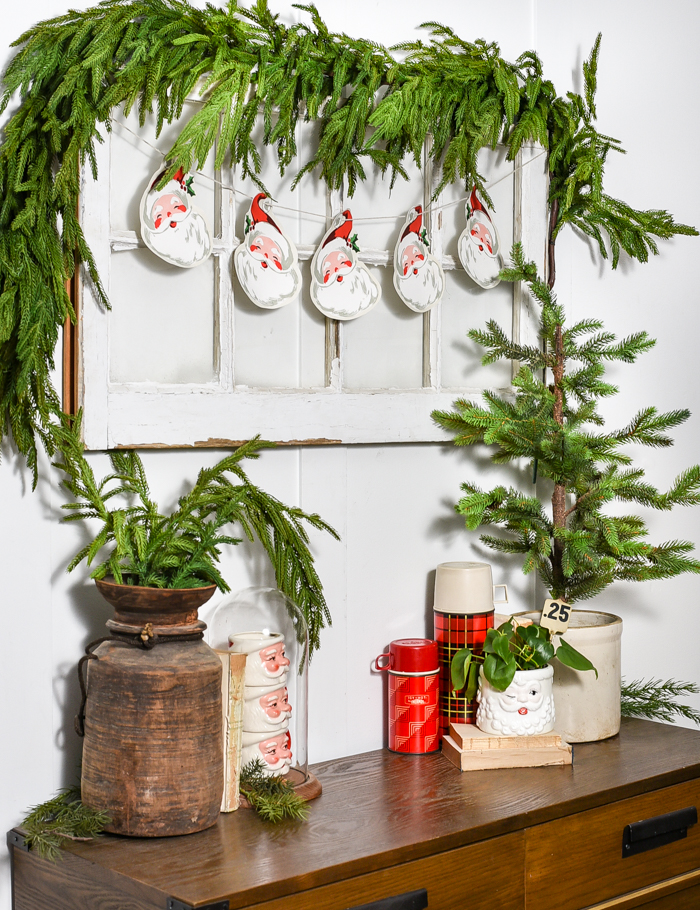
I strung my garland from a decorative antique window, but it would also look great hung from a mantel or house window.

DIY decoupage Santa garland

how to decoupage napkins

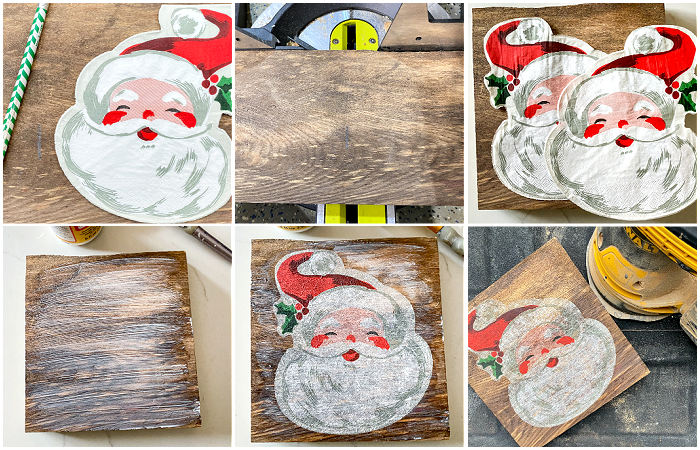
While I was in the crafting mood, I decided to also decoupage a piece of old scrap wood for a little different look.  

I cut the wood down to size then decoupaged a napkin to one side of the wood to make cute Santa Christmas art.  

how to decoupage a napkin onto wood

Decopouged napkin onto wood

If the image on your napkin is small enough you could also decoupage coasters (make sure to seal them with dishwasher-safe Mod Podge), wood ornaments, gift tags or picture frames.  Really, the project possibilities are endless!


shop our home


Click here to subscribe


Tuesday, December 6, 2022

Thrift Store Upcycle: DIY Antique Stocking Stretcher


A primitive thrift store find gets transformed into an antique stocking stretcher! 


A quick stop at Goodwill yesterday resulted in another project and I'm not sad about it. 

Thrifting has been very hit-or-miss lately, but I've been lucky to find a few affordable finds and fun pieces perfect for updating.  

The other week, I transformed a dated wood wall calendar into an antique hymn board and this week, I snagged a handpainted primitive stocking that I turned into an antique stocking stretcher. 

DIY antique stocking stretcher

WHAT ARE ANTIQUE STOCKING STRETCHERS? 

In the early 20th Century, wood stocking stretchers were used when drying socks.  The stretchers allowed wool socks to dry and keep their shape without shrinking.  Now, stocking stretchers make a great addition to Christmas mantels and holiday decor. 

Now that you know a little more about stocking stretchers, let's make one out of a thrift store find! 

SUPPLIES NEEDED


- Handmade dated wood stocking (I found mine at Goodwill. You could also cut one out of scrapwood)
- Sanding pads (80, 120 and 320 grit)
- Stain (I used Weathered Oak and Special Walnut)
- Pencil 
- Two foam brushes (one for stain and one for sealer)
- Ruler

HOW TO TRANSFORM A THRIFT STORE FIND INTO AN ANTIQUE STOCKING STRETCHER


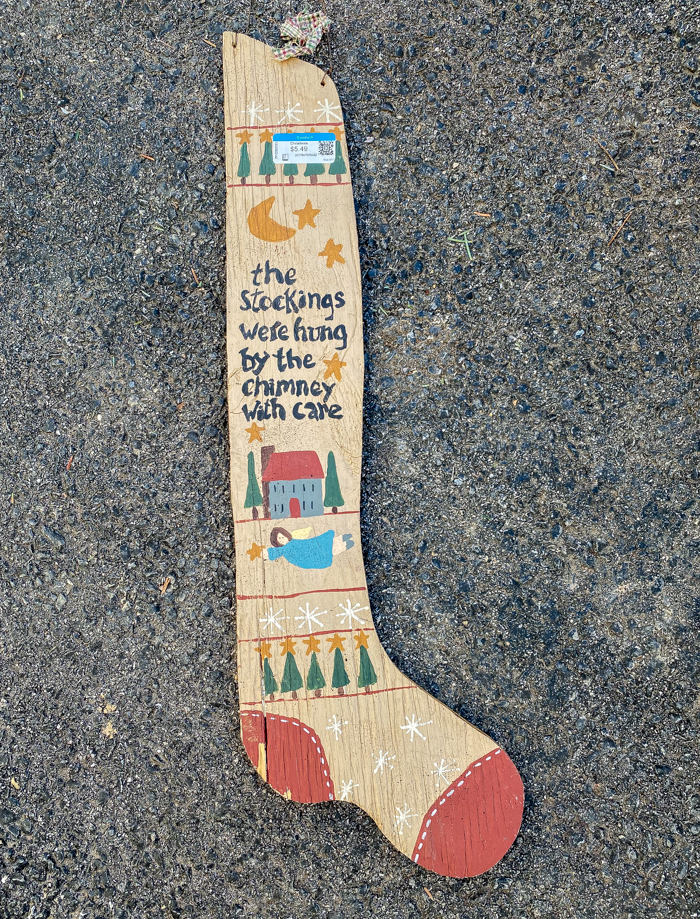
My eyes caught a handpainted wood stocking as I was quickly scanning the aisles at Goodwill.  It was very primitive and not my style, but I knew it would be super easy to turn into an antique stocking stretcher.

TIP:  Focus on the shape and material of items when you are searching for project pieces at thrift stores.  The color can always be removed or changed, but the shape may not be as easy to alter, especially if it's not made of wood.

thrift store painted stocking

thrift store primitive stocking

STEP ONE: MARK AND CUT


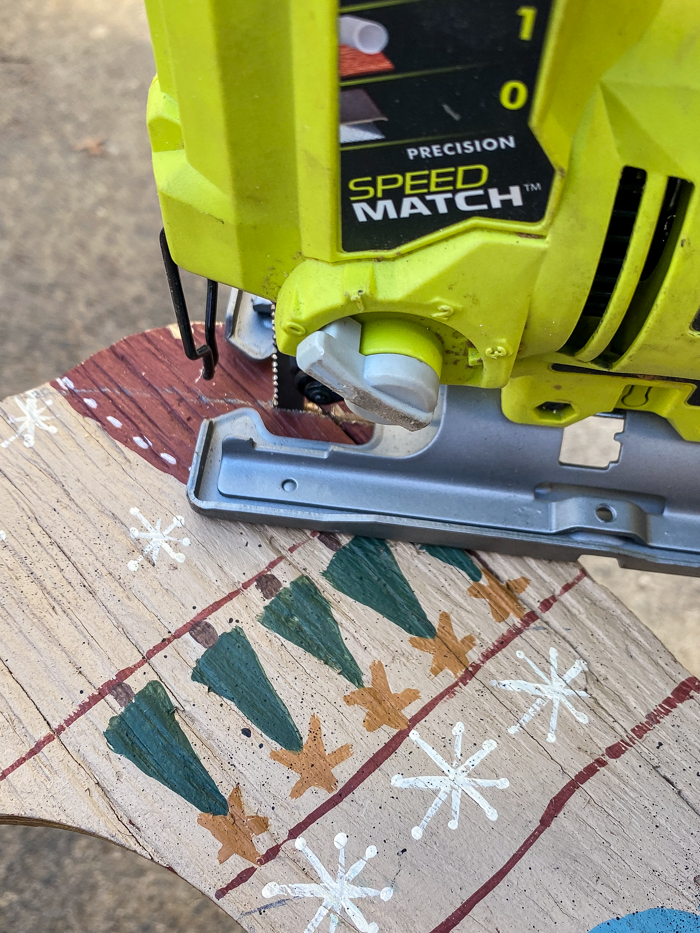
I started by using a pencil to mark where I wanted to cut the base of the stocking.   To me, the curvy heel and toe made the stocking look a bit more country and less like a true antique stocking stretcher.  My goal was to give the stocking more of an elongated stretched look. 

Once I was happy with the template, I trimmed the wood stocking with my Ryobi Jigsaw

marking thrifted wood stocking

cutting wood stocking

STEP TWO: SAND

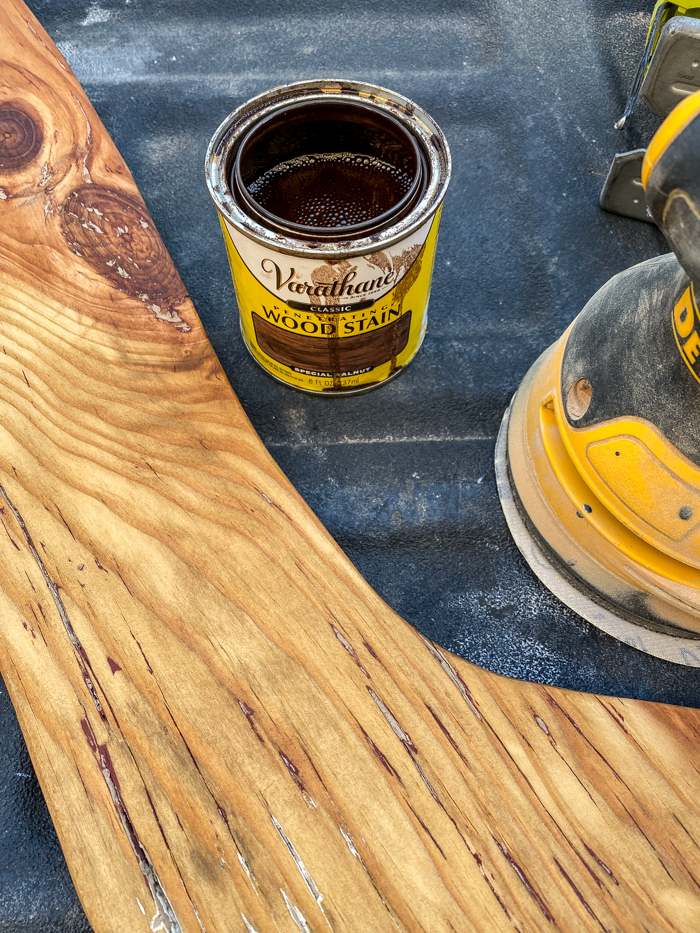
Now that the shape of the stocking looked more like an authentic stocking stretcher, I began sanding off the paint using a Dewalt Sander.  I started with 80 grit sandpaper then worked my way up to 320 grit. 

sanding wood stocking

STEP THREE: STAIN AND SEAL

After sanding (I did leave a tiny bit of the original paint to give the stocking a little more character), I stained the wood with a layer of Weathered Oak and then a layer of Special Walnut. Once the stain was dry, I sealed the stocking with a quick coat of clear matte poly

staining wood stocking

staining wood stocking

STEP FOUR: DRILL AIR HOLES

Initially, I wasn't planning on drilling air holes in my stocking stretcher, but I thought it would add a little more character and authenticity if I did.  You don't have to do this step if you prefer a solid stocking or don't have the tools.

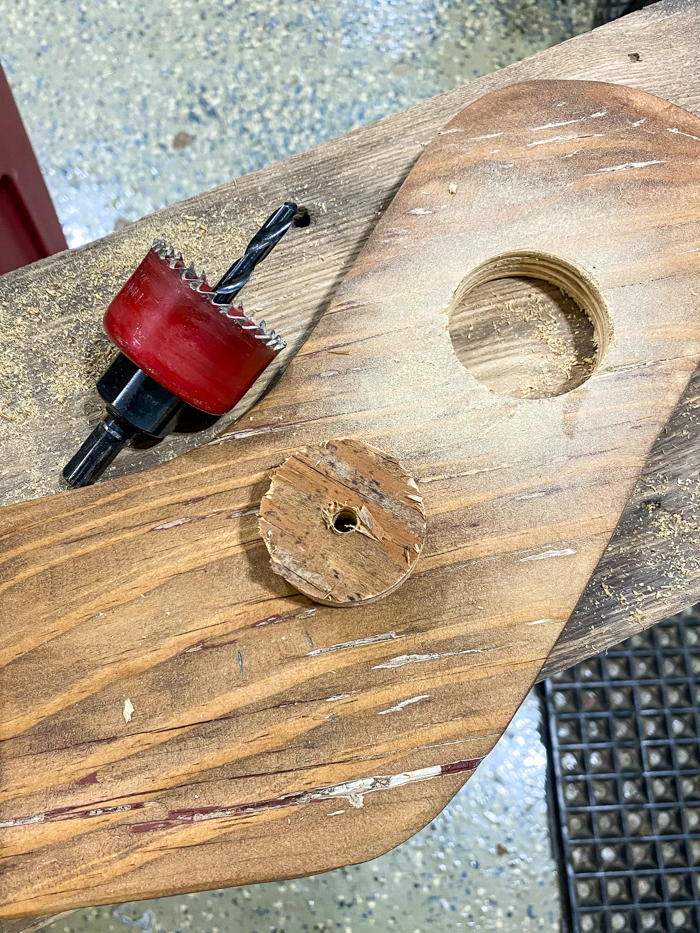
I started by measuring and marking where I wanted the holes to be then slowly drilled four holes in the wood using a 1 3/4" hole saw bit.  After all the holes were drilled I lightly sanded the stocking to smooth out any rough spots. 

IMPORTANT: Hole saw drill bits are very sharp and it's very easy to cut yourself when attaching and tightening them into your drill.  
drilling air holes in wood stocking


drilling holes in wood stocking stretcher

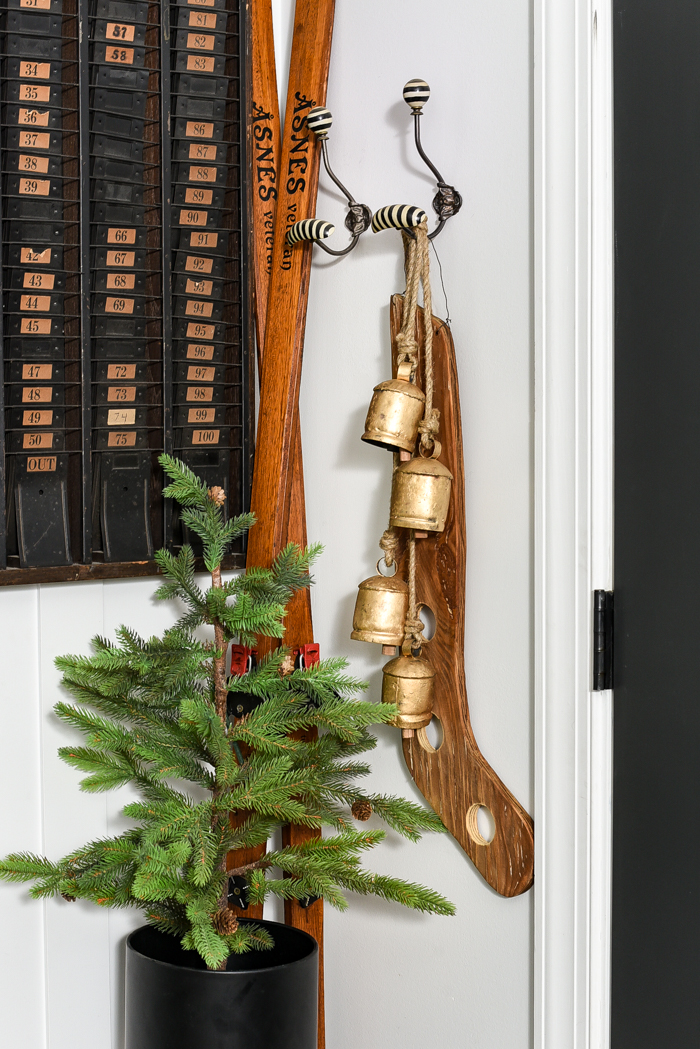
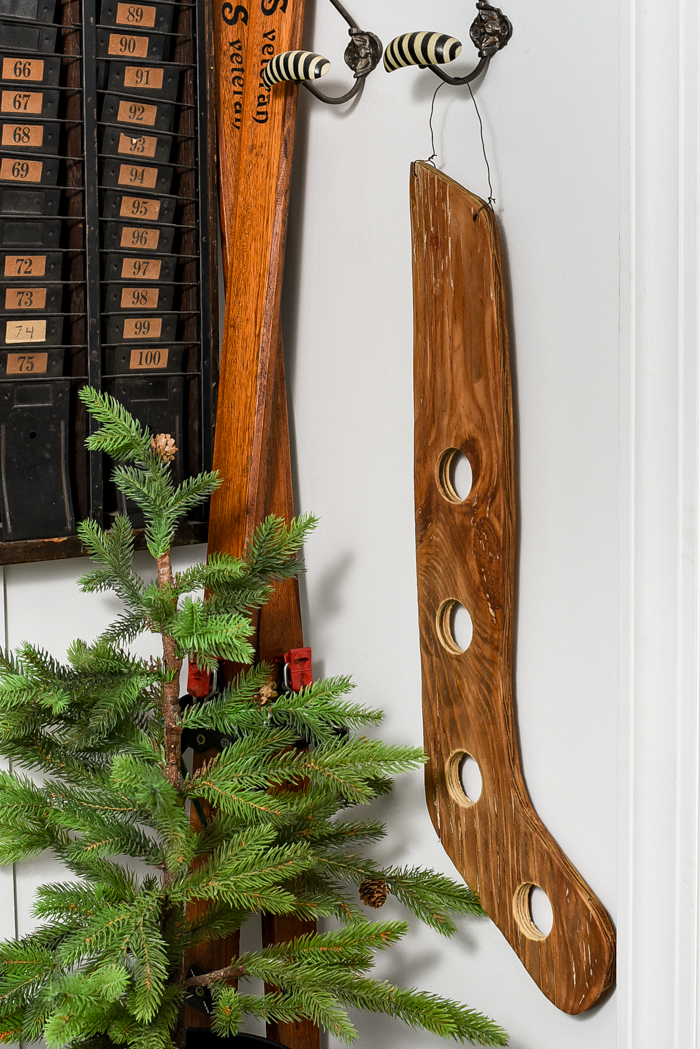
I hung the stocking using the original wire, which was old and rusty and worked perfectly.   New wire or jute twine would also work well. 

diy antique stocking stretcher

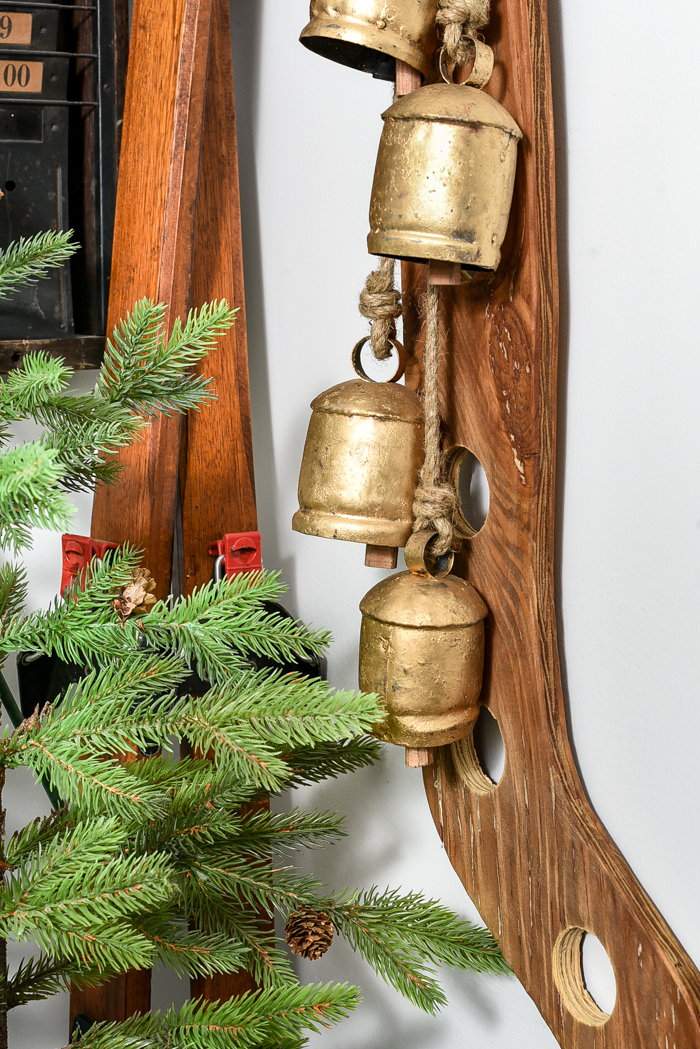
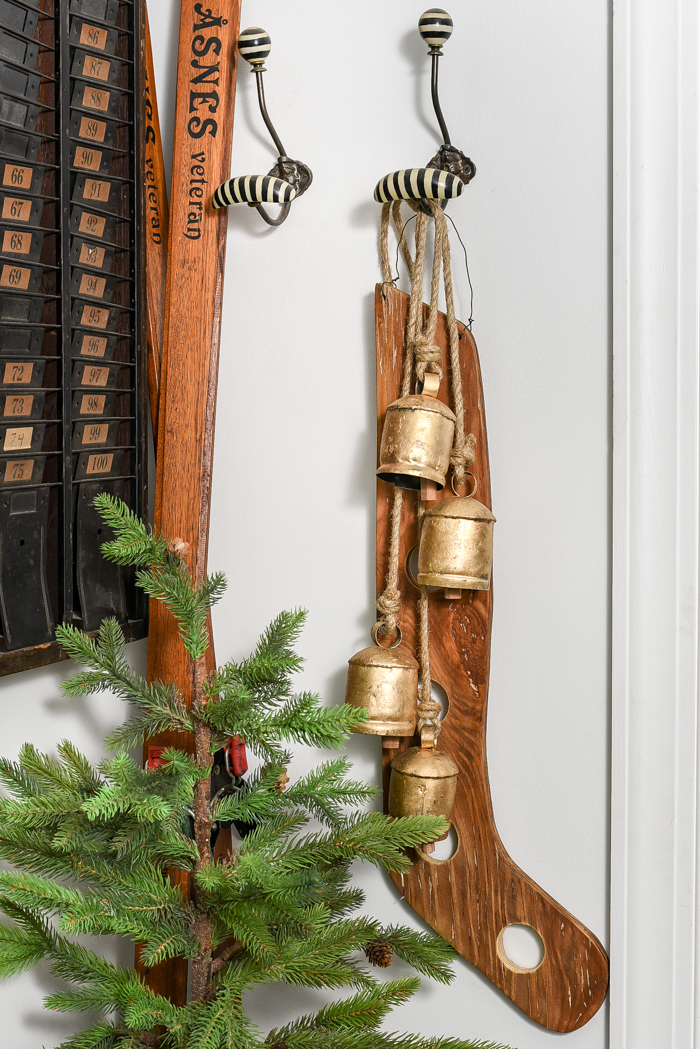
The metal bells I previously had hanging in this spot were the perfect addition for layering over the stocking stretcher.  A wreath, sprig of greenery, pair of old white ice skates or vintage sleigh bells would also look beautiful paired with an antique stocking stretcher. 
diy antique stocking stretcher

diy antique stocking stretcher

diy wood stocking stretcher

DIY antique stocking stretcher

I feel like I say this after every project, but I really do love how this DIY antique stocking stretcher turned out.  Creating vintage and antique items out of thrift store finds is becoming a new favorite hobby of mine.  It's almost as exciting as the thrill of the hunt and finding an awesome authentic antique find!


     Pin it for later


how to make an antique stocking stretcher


Shop our home


Click here to subscribe


Wednesday, November 30, 2022

DIY Antique Wood Spindle Ornaments


Learn how to turn antique wood spindles into unique rustic Christmas ornaments! 


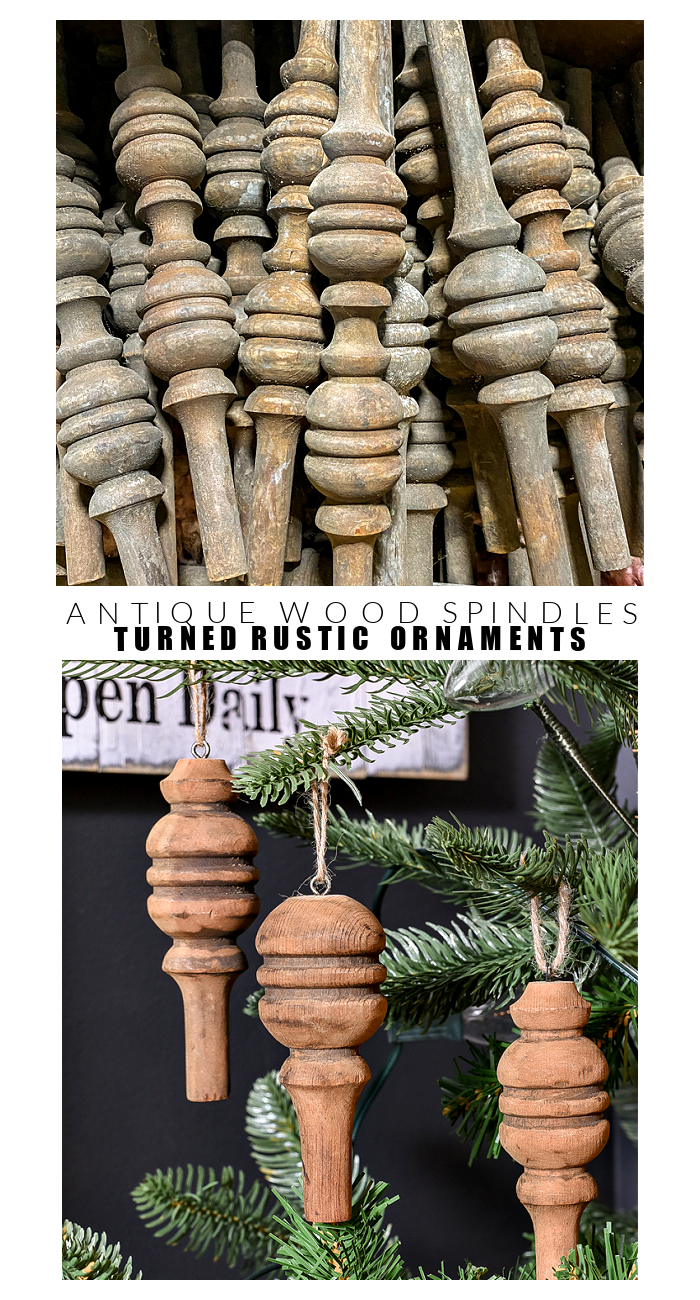
Last year, I bought a huge lot of antique wood spindles from a local auction.  

I loved their character, that they could be used as is to add a little texture and warmth to vintage vignettes or transformed into cool architectural salvage projects. 

With Christmas just around the corner and an abundance of spindles available, I decided to repurpose some of the antique spindles into unique rustic wood ornaments!
.diy antique spindle ornaments

SUPPLIES NEEDED TO MAKE ANTIQUE WOOD SPINDLE ORNAMENTS


- Salvaged wood spindles (auctions, Facebook Marketplace, salvage yards, etc.)
- Tape Measure
- Black and Gold Craft Paint (or Rub 'n Buff)
- Small craft paintbrush
- Scissors
- Pliers

STEPS TO MAKE ANTIQUE WOOD SPINDLE ORNAMENTS 


STEP ONE: BUY ANTIQUE SPINDLES

The first step is to buy salvaged antique wood spindles.  Turned spindles with lots of detail work best and can be commonly found at auctions, salvage yards and on Facebook Marketplace by searching "antique wood spindles."  

Antique wood spindles

STEP TWO: CUT SPINDLES INTO ORNAMENTS

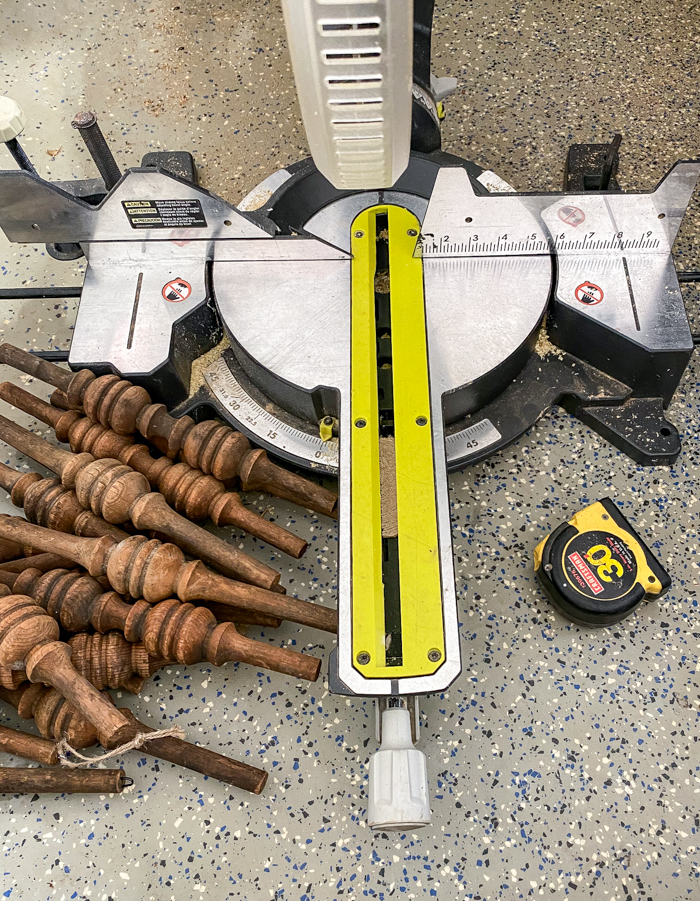
Decide the length you want your ornaments, which may be determined by the detail of the spindles then mark and cut your spindles using a mitre saw. 

I had two different styles of spindles, which allowed me to make four different ornaments. 

cutting antique wood spindles

cutting antique wood spindles

cut wood spindles

STEP THREE: SAND SPINDLES

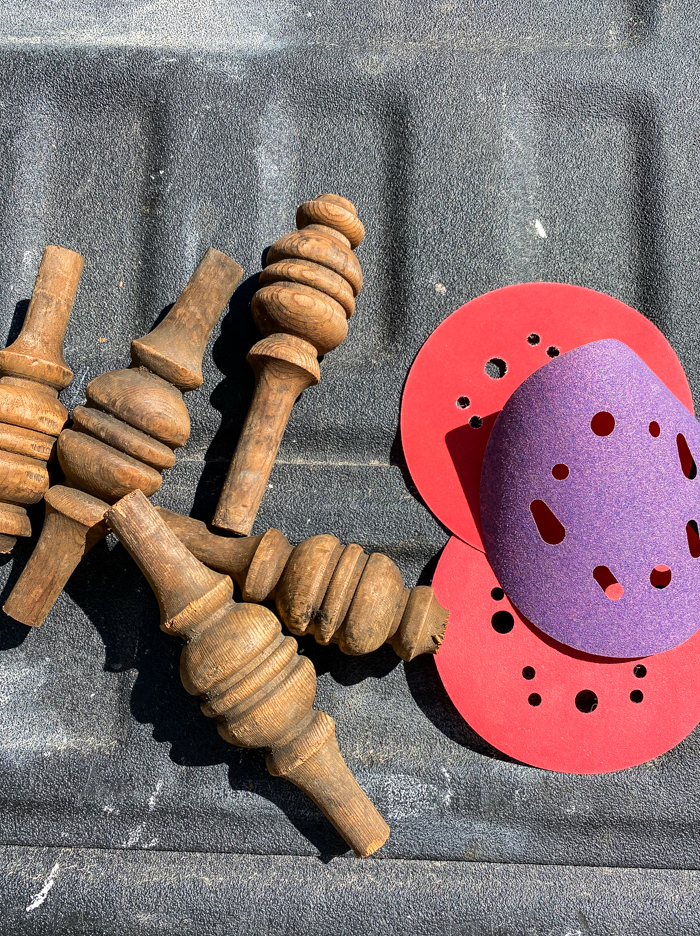
Once all your wood spindles are cut, grab a piece of 150-grit sandpaper (I also used my orbital sander) and sand each spindle until they are smooth and any old finish is removed.  

I opted to leave a bit of the old stain in the groves of my ornaments.  You can sand your ornaments completely for a raw wood look or leave a bit of stain in the groves like I did for a little extra depth and character. 

sanding cut antqiue spindles

STEP FOUR: PAINT EYE SCREWS

I was trying to use what I had on hand, so I used silver eye hooks and then layered on black and gold paint (Rub 'n Buff would work too but I couldn't find mine) to give them an aged look.  If I was purchasing new supplies for this project, I would have opted to buy antique bronze eye hooks.  

Painting eye screws for ornaments

STEP FIVE:  ADD HOOKS AND JUTE FOR HANGING

Screw one eye screw into the top of each ornament then cut and attach a piece of jute for hanging. 

Tip:  Use pliers to screw in the eye screws if it's too difficult to do by hand. 

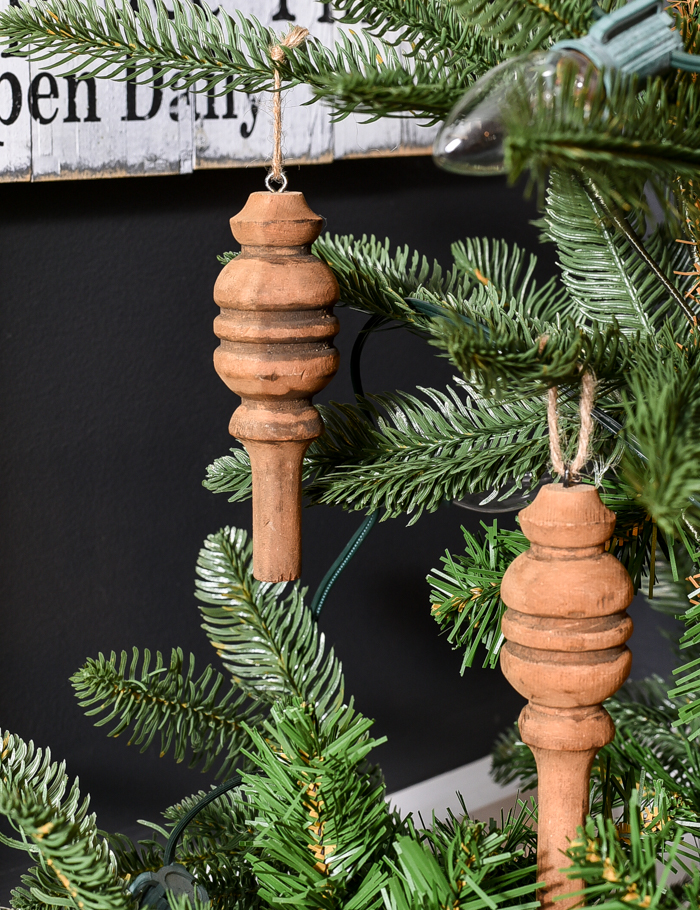
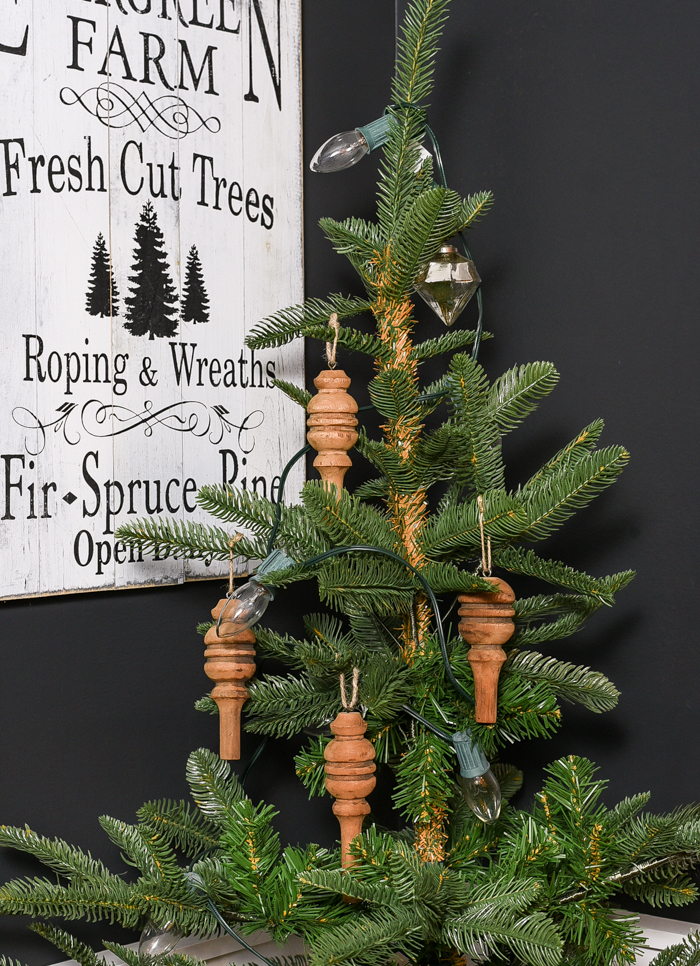
DIY antique wood spindle ornaments

How to make antique spindle ornaments

DIY spindle ornaments

How to make ornaments out of antique spindles

These antique spindles turned ornaments are a great way to repurpose old wood and add a touch of rustic character to your Christmas tree! 

What do you think?  Would you make these DIY ornaments?


     Pin it for later


DIY antique spindle ornaments


shop our home


Click here to subscribe


Sunday, November 27, 2022

Vintage Modern Christmas Mudroom 2022


A vintage modern mudroom decorated for Christmas with simple neutrals and classic vintage decor! 


I got a late start decorating for Christmas this year, but I took advantage of a couple lazy days after Thanksgiving to empty a few more Christmas bins. 

Last week, I unpacked my favorite Christmas bin and shared ways to decorate and style vintage Santa mugs.  Today, I'm sharing a peek into my vintage-modern Christmas mudroom.  

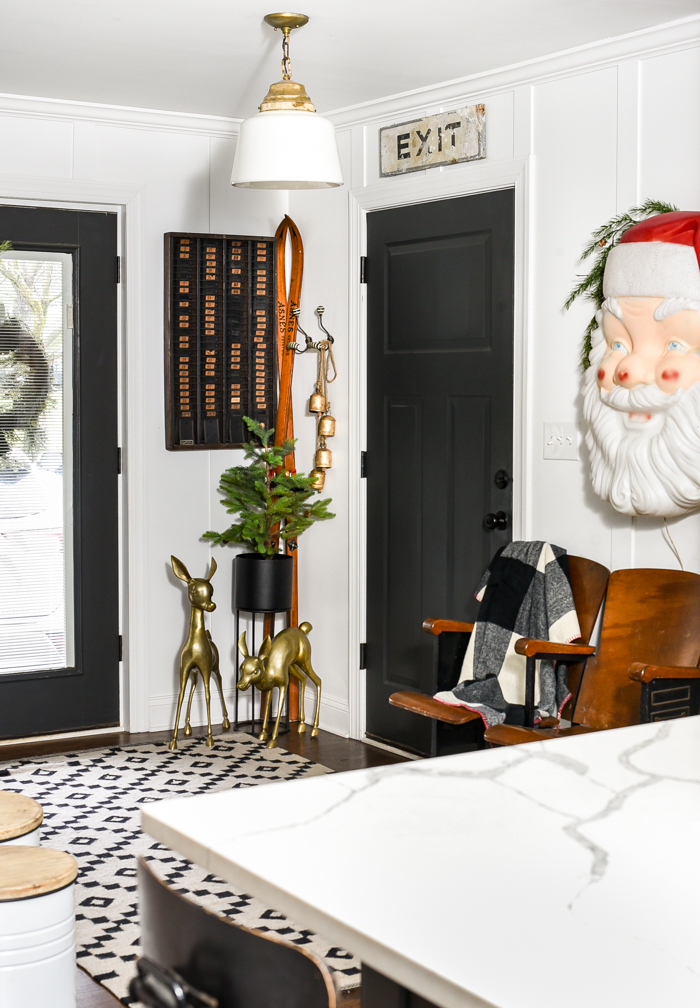
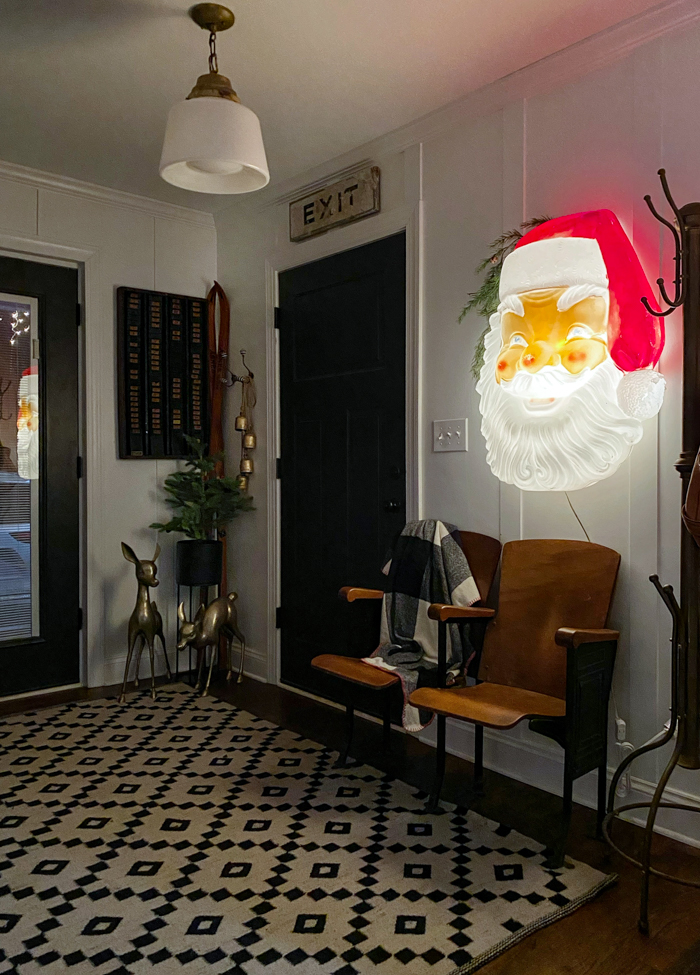
I primarily stuck to decorating with neutrals with the exception of a little pop of red from my "new" vintage Santa head blow mold.  He was a recent Facebook Marketplace find and I could not wait to hang him in the mudroom for Christmas. 

vintage-modern Christmas mudroom

I have to admit, as I started decorating the mudroom for Christmas I gravitated towards using the same decor as last year.  I thought about changing it up a bit, but the truth is, I love what I love and I it just didn't feel right to make changes simply for the sake of sharing something new and different. 

So, here is my very neutral, very minimal, very ME holiday-decorated mudroom!

neutral Christmas modern vintage mudroom

I used a lot of what I already had then incorporated a few of my favorite holiday and non-holiday vintage finds.

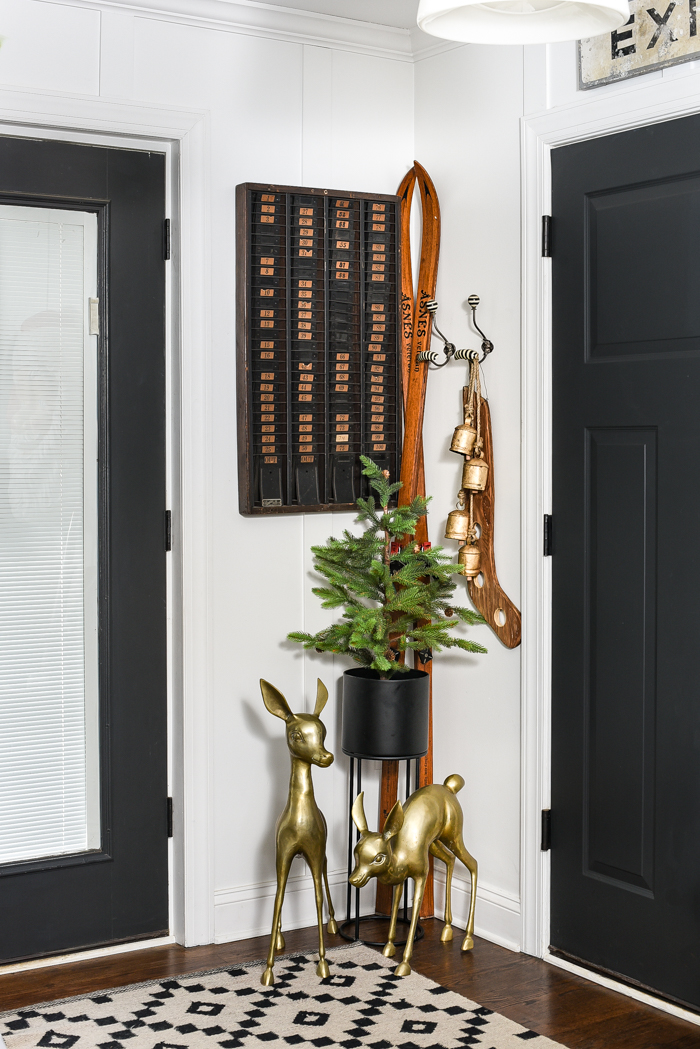
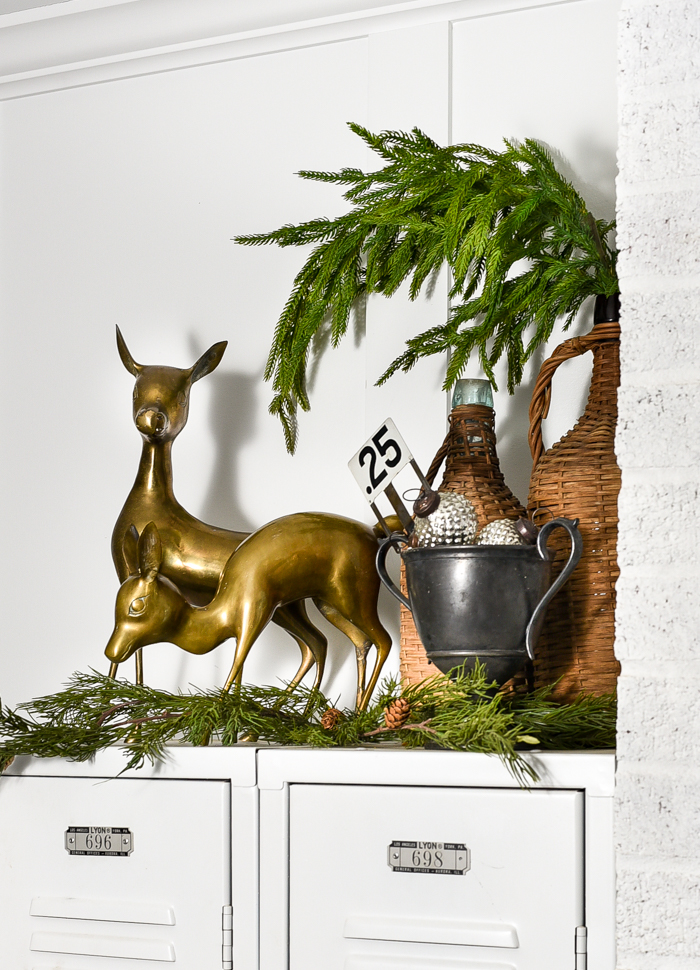
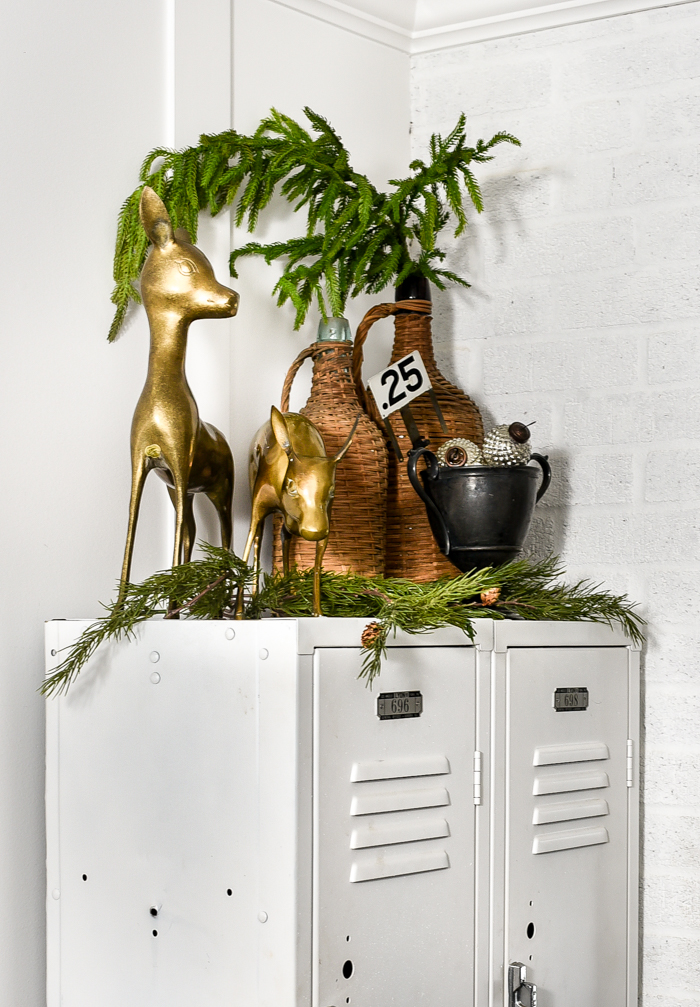
These adorable vintage MCM brass deer were another Facebook Marketplace find that I absolutely adore.  Aren't they so cute?

Vintage mcm brass deer
I placed them on top of the mudroom lockers along with a thrifted sterling dish filled with ornaments and a few pieces of my favorite winter greenery.  
vintage mcm brass deer
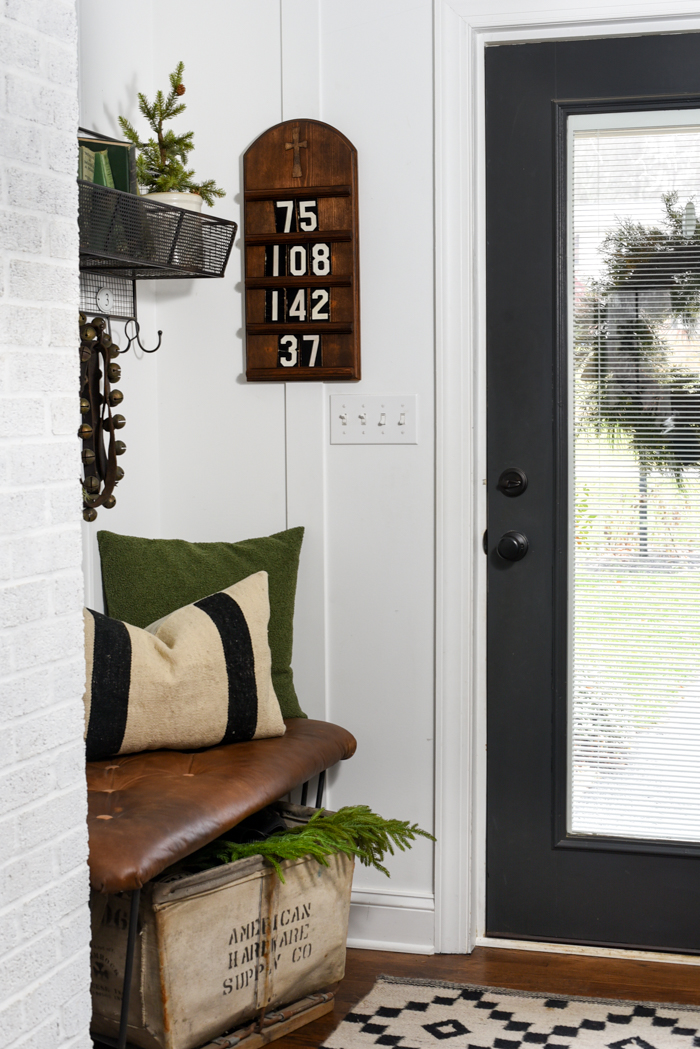
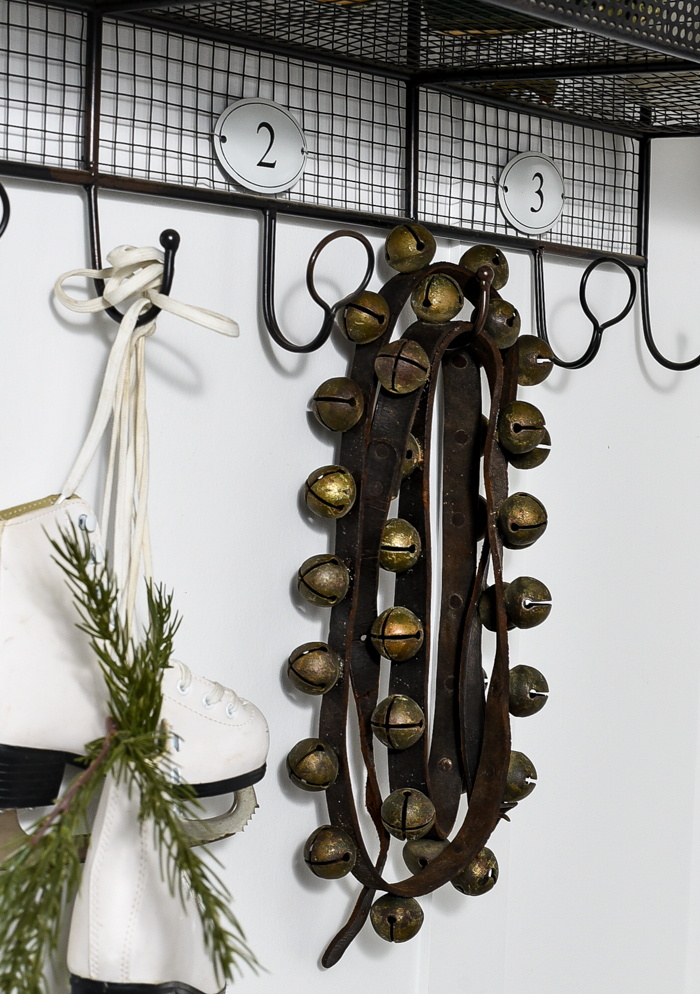
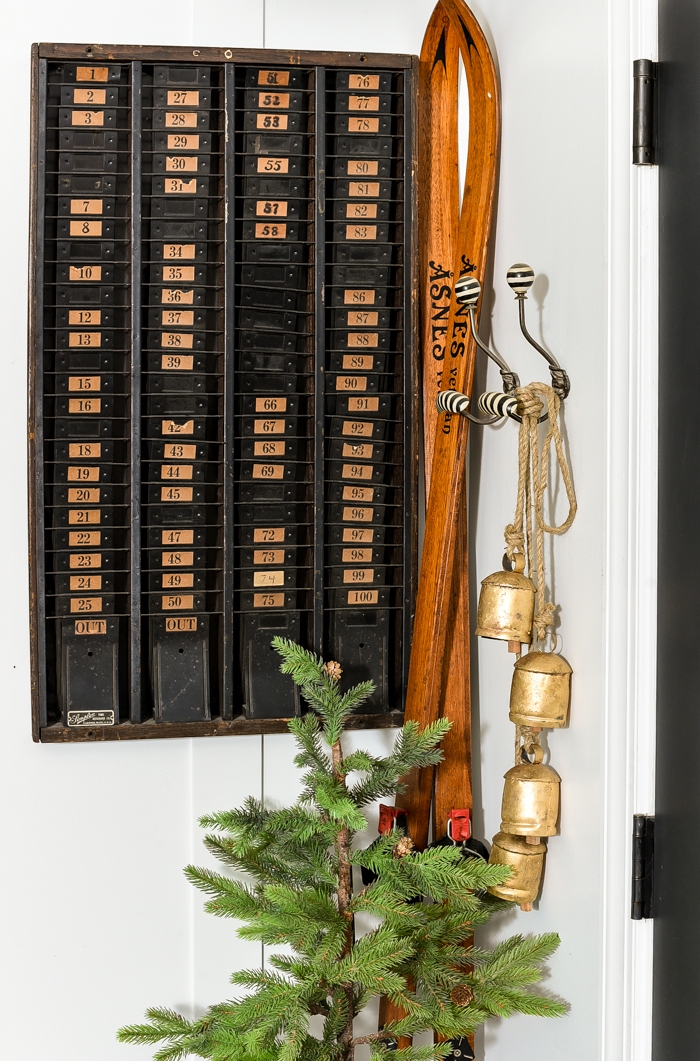
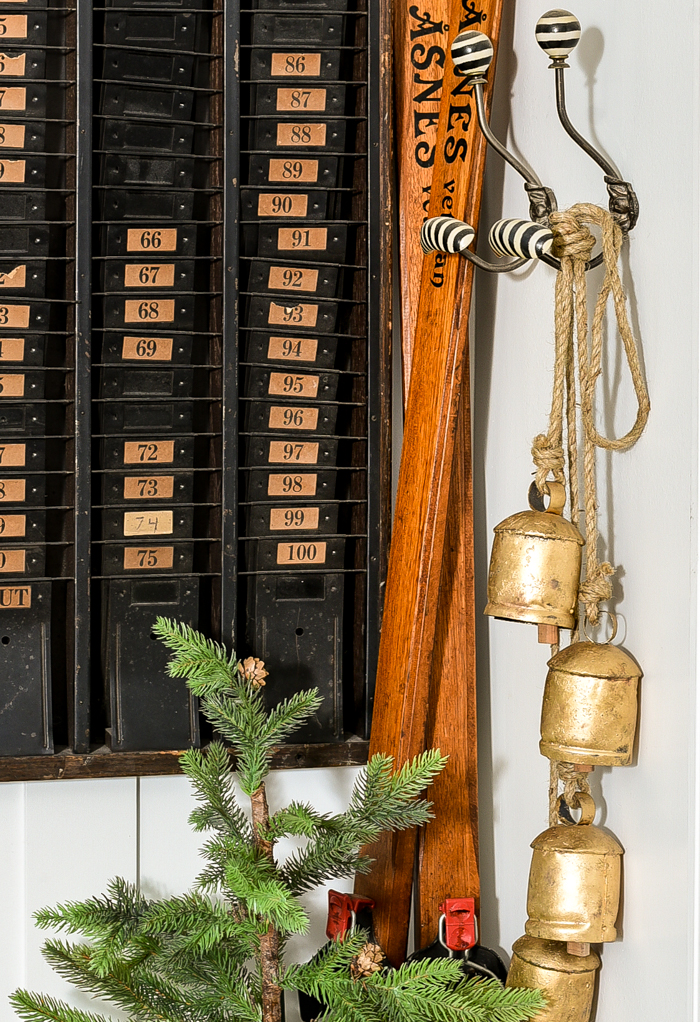
I kept my dated calendar turned vintage hymn board on the wall, swapped out the pillows for ones that were a bit more wintery and hung my favorite full strand of antique sleigh bells from the mudroom hooks.
neutral vintage modern Christmas decor

antique sleigh bells
I also decided to keep the vintage time cardboard instead of swapping it out for a Christmas sign.  It's not a Christmas decoration, but it works well with my vintage skis and hanging bells.  
neutral vintage Christmas decor
Can we talk about those incredible brass deer?  I got them for a steal at an auction and leave them out all year long.  They are way too good to be put away in storage and only brought out during Christmastime.  
vintage modern neutral holiday decorated mudroom

brass hanging bells

vintage modern decorated mudroom, vintage brass deer
The huge vintage Santa blow mold head found a home where I had a large mirror.  It was the perfect place to hang him and I love walking by him multiple times a day.  
vintage modern Christmas decor, Santa blow mold head

Large vintage Santa blow mold face

And just for fun, here's a quick dark iPhone shot of Santa all lit up at night! 

vintage Christmas decor, Santa blow mold face

Most of my holiday decor is vintage and has been collected over time, but you can get the look with these vintage-inspired holiday alternatives


shop our home


Click here to subscribe