Hello all! I've gotten so many questions about the planked walls in our loft lately, I decided to give you a step-by-step process on how to do it. If you love the shiplap look on Fixer Upper than this is the tutorial for you! This is the same look but waaaaay less.
It cracks me up that this look is called shiplap now -- yes, I know, that has been around forever but many of us called it planked walls for years. I've done it numerous places around our home and I'll link to those at the end of the post. I've done it a few different ways and this one by far the cheapest and most customizable.
Here's our large planked wall in the loft before I started the other walls:

I love it!
Now REAL shiplap is not cheap:

This is 12 feet so in terms of trim or wood, that price isn't too bad. But that wall above would have at least $150 (it's wider than what I used so not sure exactly how many I'd need) and it only cost me about $65 to do that huge wall.
Real ship lap is thick and has tongue and groove that you use to "lock" them together:

Instead I use underpayment, or luan. It comes in four by eight foot sheets and you can have it cut down to whatever width you want. I find if I do 5 3/4 widths than I get get a full eight strips out of each board:

I love that it is very thin and lightweight -- really easy to work with. I also love the look of it. When painted if you look close it has a slight wood grain.
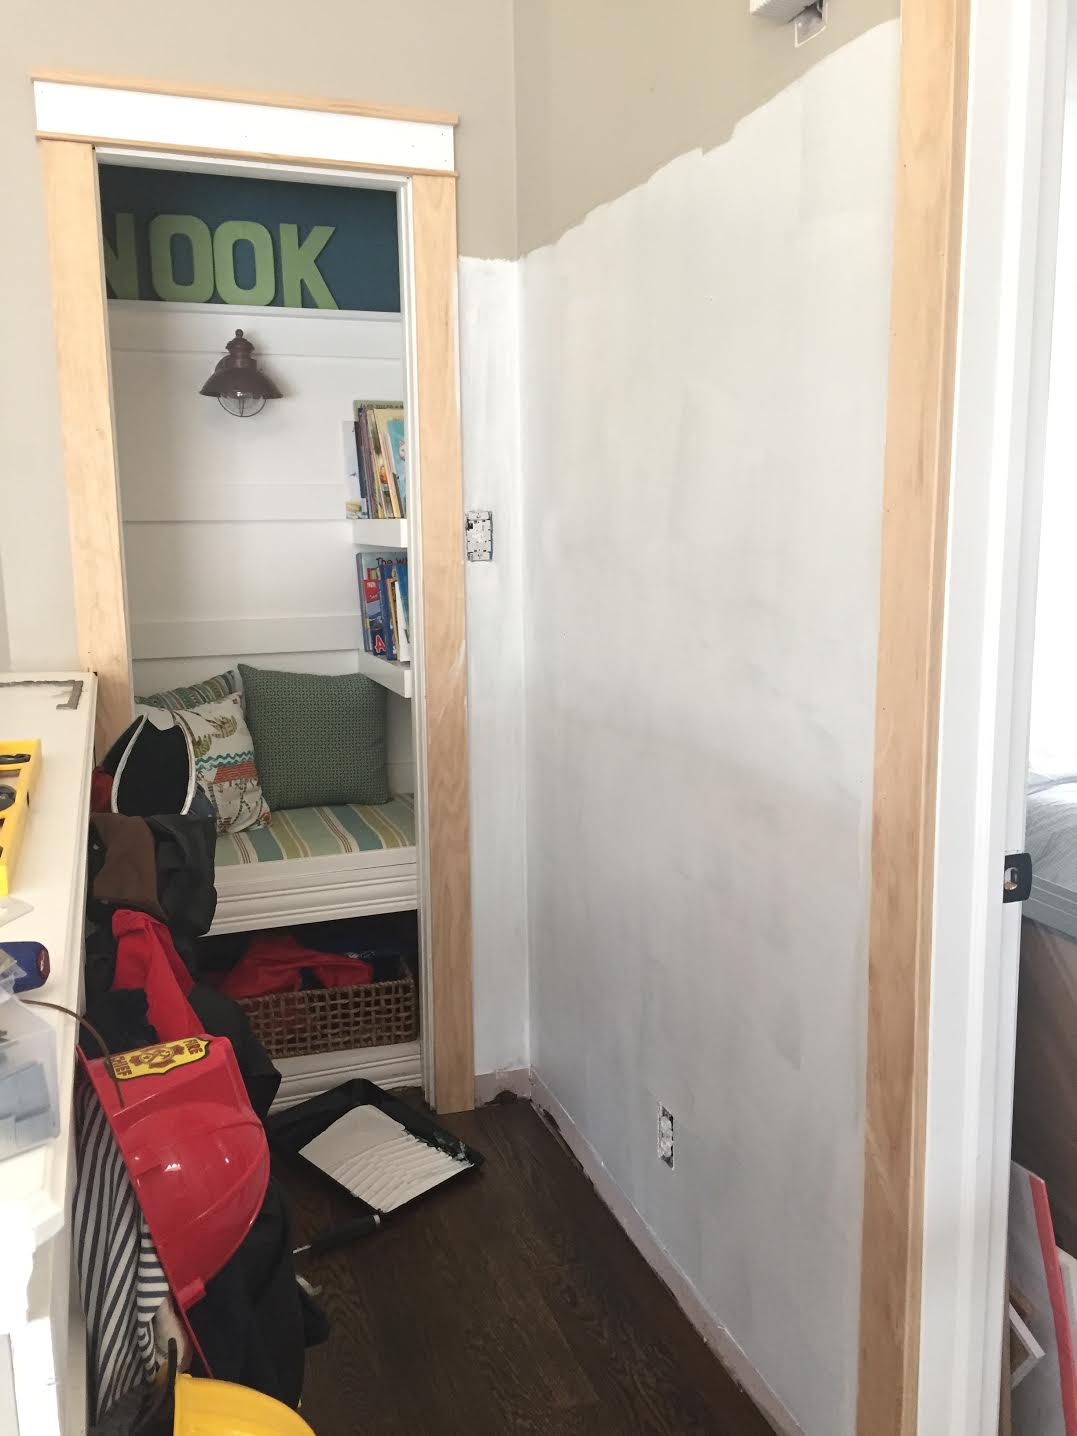
Here's a before shot of a wall that I finished up the other day. This is going to be fun spot in this room (I'll tell you more about that later):

That's our book nook, one of my favorite spots in our house! As you can see we also keep the dress up clothes here. My son has mostly grown out of that but other kids love to use them so they will stay. :)
The first thing you'll want to do is paint the wall behind the wood the color you'll paint the planks. I am not picky about this -- it's one coat and done for me:
Then you can use your pieces and start hanging them. Something to consider now -- it used to be free to have these cut down at Lowe's. Then they added a small .25 cent fee to anything over a few cuts. Now…$1 a cut?:

I understand that this probably takes up a ton of their time so I'm totally on board for charging, but the increase surprised me. And the scheduling part too. I had just seen this sign so was nervous they wouldn't help me but they did and didn't charge. I find if you go during the day at a slow time (late morning or mid-afternoon during the week) then they are happy to help. I'm not sure if Home Depot is charging as well?
Anyway, keep that in mind if you don't have a saw or someone who can help you!
When I install my boards I use a level to make sure each one is straight but the most important one is the first! Make sure that one is perfectly level. Then after that I keep using the level and adjust certain areas as needed. For spacing I use a penny:

You can use anything, this helps to keep it consistent.
Here's another tip -- if you have a long expanse to cover I suggest you cut some pieces at the length of the studs. I marked on the wall where they were (for nailing them in anyway), but this also gave me measurements for some of my boards.
I did a very simple pattern based on the studs and kept it consistent -- one long piece, one cut about in half (at the stud) and then would rotate from left to right with a long piece/short one on the next row. I repeated that pattern all the way down:

Cutting your wood will make it go further. If you cut each piece the length of the wall that is great, but you will have a TON of scrap that will go unused. I find cutting them makes it so I can use almost every bit of the luan.
And you cut at the studs so that the end of each piece is secure when you nail it in. If the end of your cut is not at a stud then the wood may not always hold flat against the wall. Again, this stuff is pretty thin so that's not a huge problem.
Some putty to fill holes (sometimes I just leave them because I like the look) and few coats of white with a roller is all you need to finish it off:

This actually needs one more coat, and the door trim needs to be painted, and that small wall needs to be done…but you get the idea. ;)
I will add a couple of smaller trim pieces up on top to finish off the wall as well.
I love this look (as you know if you've seen the rest of my house) and it's becoming extremely popular because of Fixer Upper. Here's a look at that wall (mostly) finished up:

Do you see my little addition down at the bottom? This is going to be our Disney wall with photos and mementos from our trips and I wanted it to be FUN. I found a fairy door online months and months ago and had to get it:

I think it's adorable and I have a couple more additions to that to finish it up too. :)
Here's a look at the other side of the room with the finished "shiplap" walls:

Here are some other shiplap/planked wall projects I've completed over the years!
Our family room fireplace:

A stained accent wall over the basement kitchenette:

(That's one of my favorites!)
On our basement stairs I used simple wood planks that come in packages (these are thinner widths):

I also used these in our powder room renovation:

Those are easy to use as well but often many of the pieces have huge knots in them and I end up taking a bunch back. The luan is much cleaner and easier to work with. :)
Have you added this look to your home? Feel free to add links in the comments if you have. I will be back next week, as I'm heading off to the Haven Conference for our fifth year! Can't believe it!
See you next week! :)


0 comments: