Saturday, February 18, 2017

The beautiful color trending this year (it's my favorite!)

Hello! Are you ready for the weekend? I'll be working on a fun project in the basement -- I hope to share it with you next week! 

I kind of can't believe it but it's true...I am ahead of the game with a decor trend. This NEVER happens. Usually I'll sit by and watch to see if I really like something -- for years -- and buy into some of them when they're not even trendy anymore. It's my thing. 

But THIS time I am right there in it and even though I don't find it "trendy" at all, the color BLUE is all the rage this spring. I think it will continue on throughout the year so if you are a blue lover, rejoice! We are cutting edge my friends! :) 

What I think is particularly funny is I used to say I'd NEVER add blue to our home. I disliked it very much. But minds can change and for years now I've been obsessed with it. You'll find various tones of blue in every room of our home. I also think it's funny that just in the past few weeks I've deliberately been adding in some different colors (that I'll show you soon) other than my beloved blue. I'm always missing the mark. 😂

But I could care less and could write a whole post just on trends. I say if you like them, use them. If you don't, DON'T. Who cares, it's your house! 

I've noticed blue in many places lately and had to share some of my favorite instances of it and how to use it well. I was at the fancy mall yesterday and was drooling at all of the pretty blues used in the Pottery Barn displays. You can see some beautiful ways to incorporate in their latest catalog: 
Traditional blue decor Pottery Barn

Blue is a chameleon. It looks clean and crisp with white, and can easily go nautical. But with the right touches it can also be both traditional like the photo above, and contemporary like below: 
Blue contemporary decor Pottery Barn

It's all in how you style it. There's something wonderful about this color -- it's grounding like black but with the punch of color. At the same time it's very soothing and easy on the eyes: 
Using blue in decor

We visited the Indy Home Show last weekend and the model home this year (by Fischer Homes) was gorgeous as always. It had a slightly nautical feel but it went much more modern than I've seen before. There was blue everywhere, which I loved!:
Dark blue grasscloth walls

The walls in the bedroom were navy blue grasscloth -- stunning! 

I was obsessed with the dark blue vent hood in the kitchen: 
Dark blue vent hood white kitchen

So lovely against the white cabinets. What a great statement piece. 

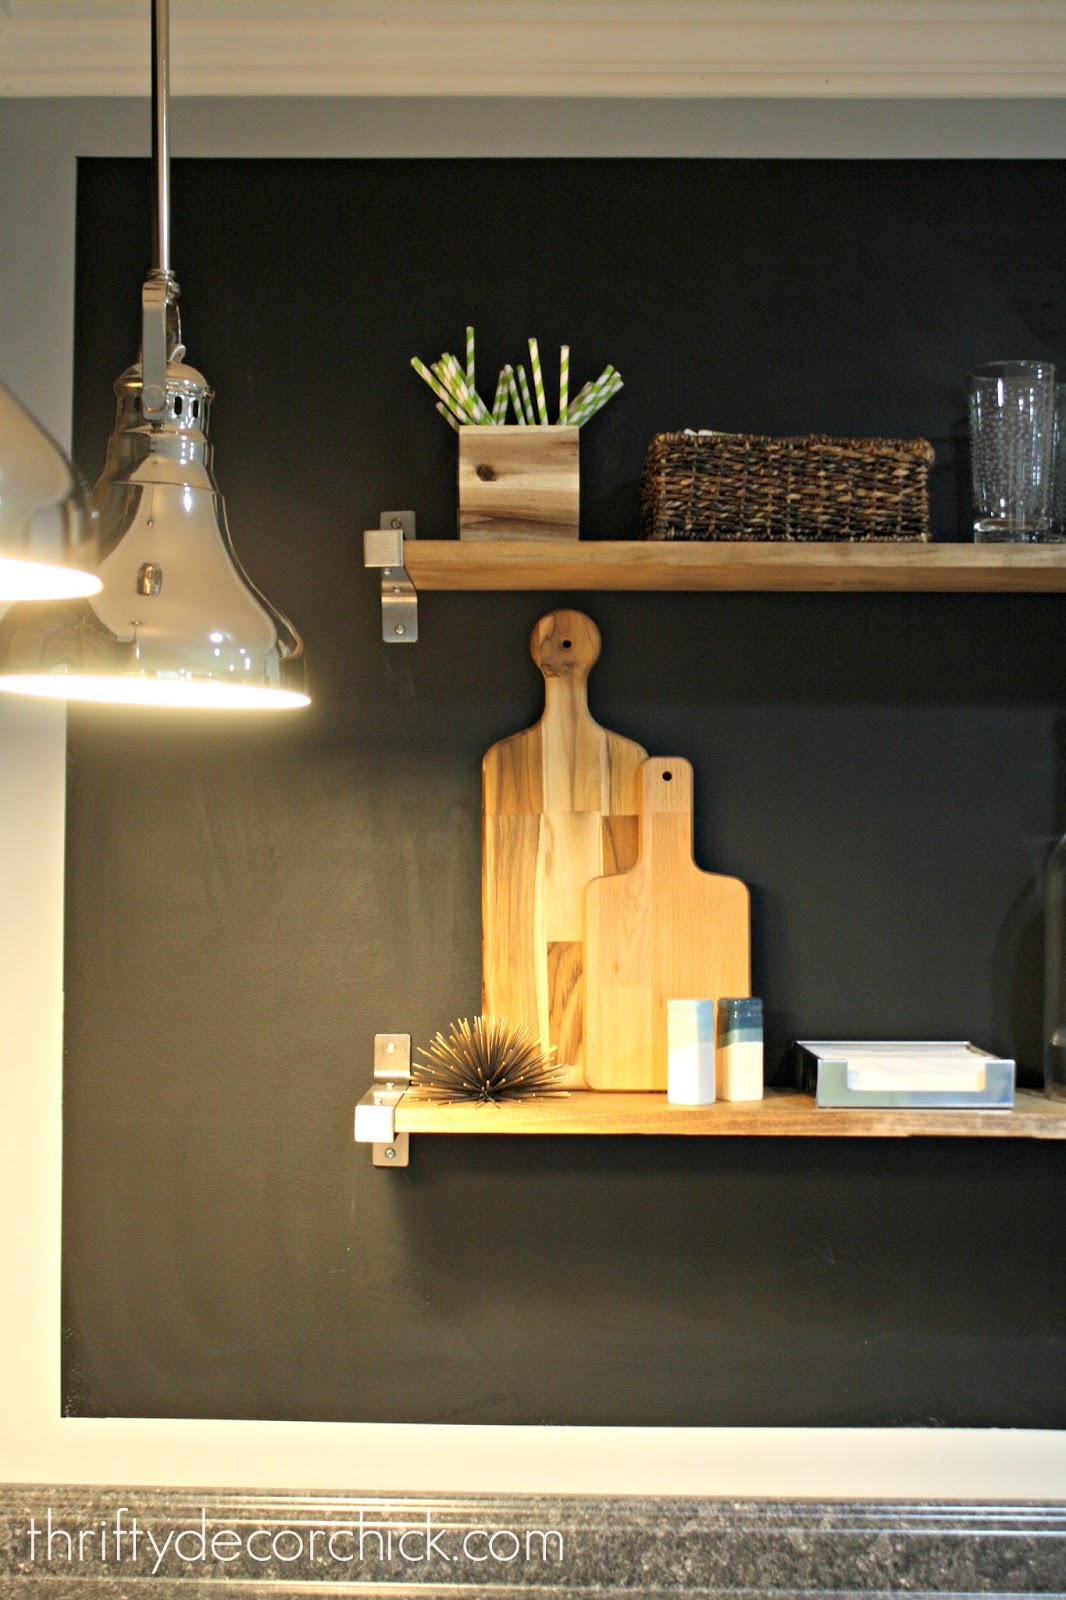
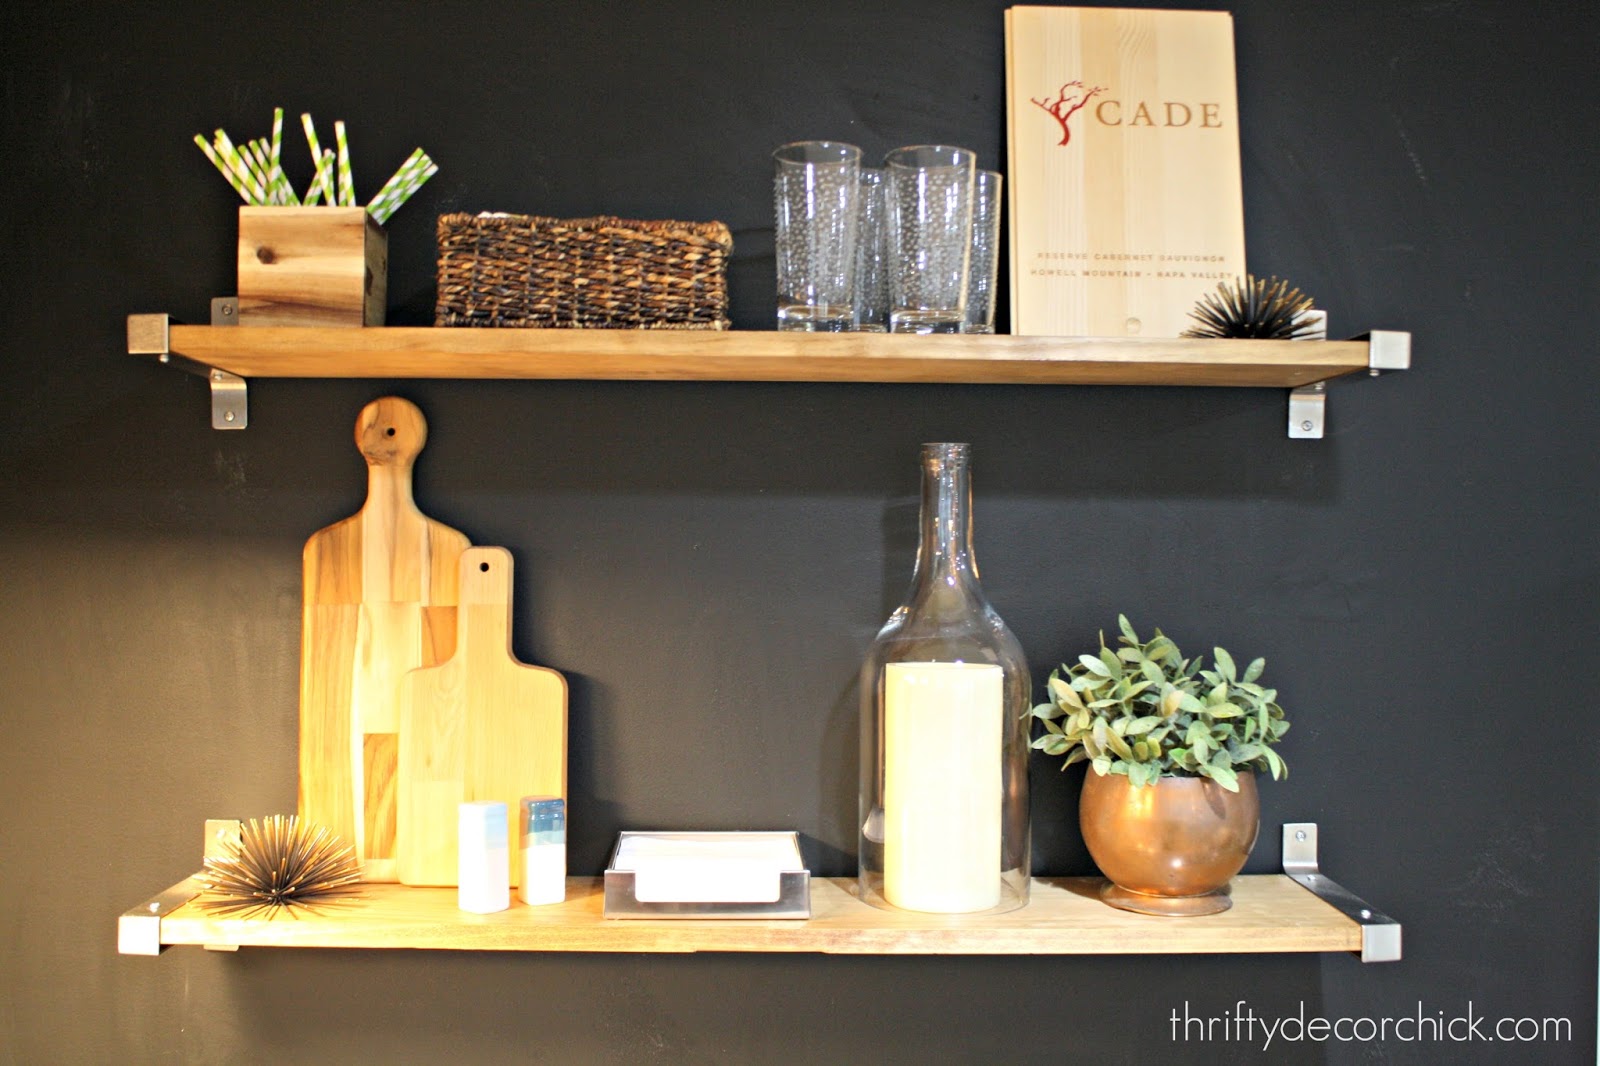
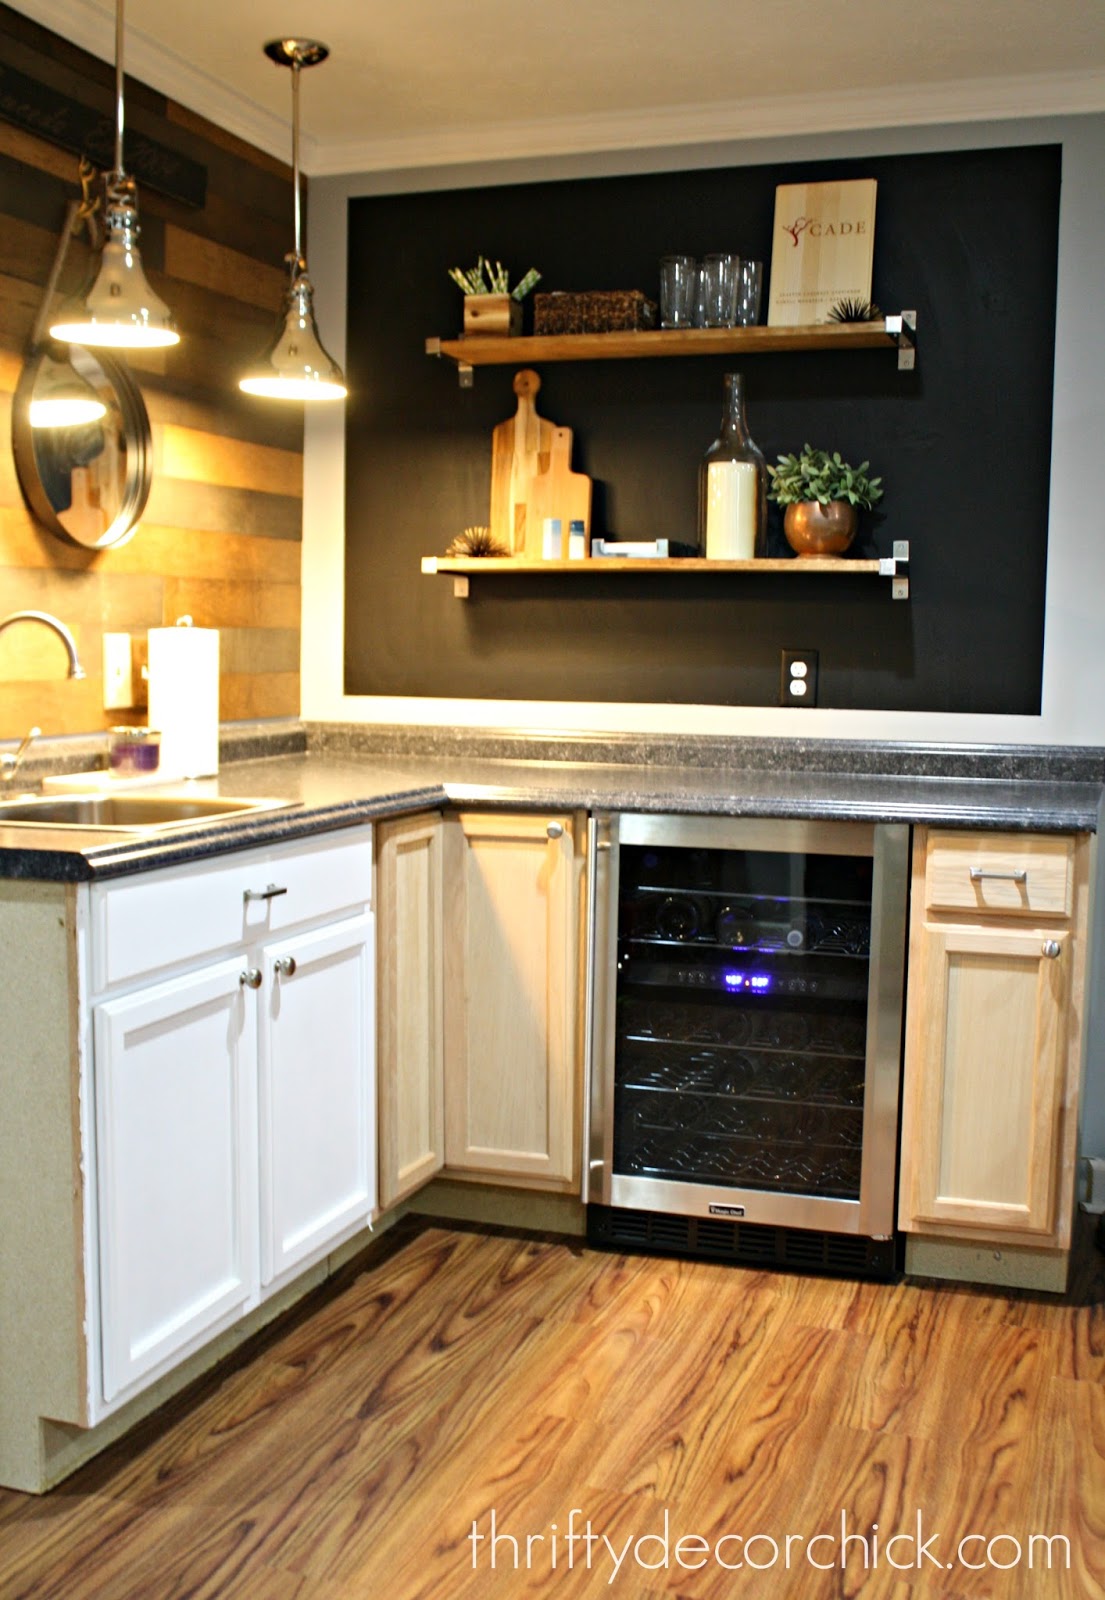
The best part was this dark blue wall with chunky cedar shelves in the family room: 
Dark blue walls with chunky shelves

I just LOVE a navy blue wall! (Check our our son's navy blue bedroom here!)

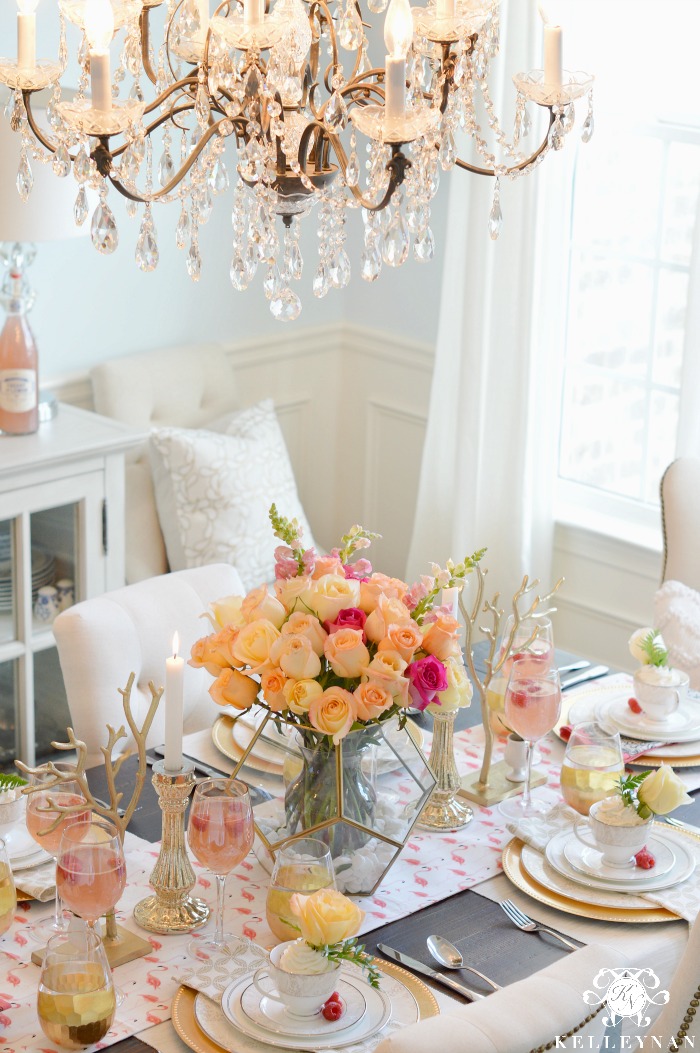
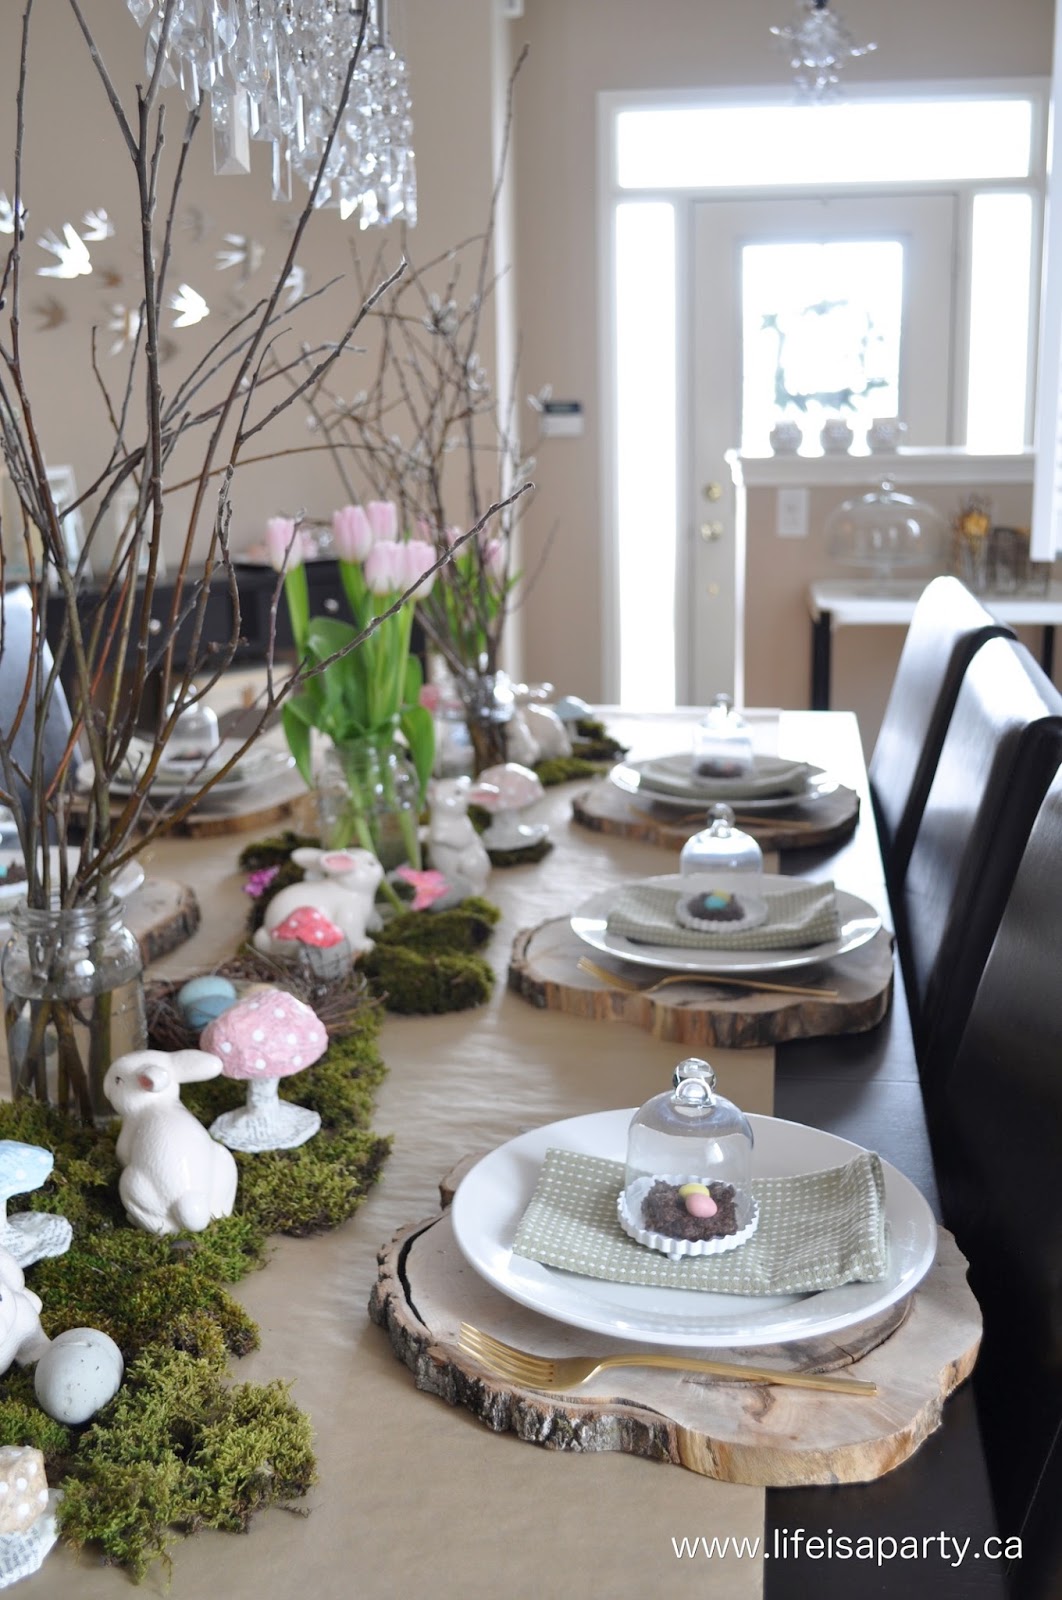
The decor stores at the fancy mall were filled with blue. This tablescape at Williams Sonoma really caught my eye:
Blue tablescape

So gorgeous! 

Blue is a beautiful color alone but works well with every color -- I honestly haven't seen a blue combo I didn't like. I always lean towards a more classic/traditional combination with white or neutrals, but this color really does work with anything. 

Do you use this color in your home? Are you ahead of the game for once like me? ;) I'm totally reveling in this happening once in my life, ha! 


Friday, February 17, 2017

When in doubt, add some circles!

The new coffee table arrived for the living room and I can't wait to show it to you! First though, the reason why I went with this particular table. 

Because I love adding wall treatments around our house, we have a lot of "hard" lines. A lot of squares and rectangles if you will. Plus you add in furniture, which for the most part is the same shape -- and you get a long of corners and not a lot of softness. 

Adding in some circles is the perfect cure for too many lines. :) I try to soften specific spaces that have a lot of horizontal or vertical lines with round items. Sometimes just a wreath will do the trick:
Black glass pantry door

Dark gray fireplace with marble tile

And round light fixtures go a long way to breaking up all the lines in a space: 
DIY built in bookcases

Sometimes something as simple as a round knob does the trick: 
Navy dresser glass knobs

And one of my favorites is a round mirror!: 
round Ikea mirror over console

Planked wood wall on stairs

Starburst mirror over dresser

So when we got the new sofa in the living room a couple weeks ago I knew I wanted to go round for the coffee table. We have round wood table that used to be in that room, but I love it so much we moved it to the family room. :) That's why the rectangle coffee table was out in the living room last time I shared it with you. 

I wanted something round to break up all the lines in this room, but couldn't find anything affordable. At first I wanted a solid round wood table, but the one I feel in love with was about $1300. Uhh, no. :) 

So I kept searching and wouldn't you know -- I found one I loved on Amazon. It's a Sauder glass and metal table
Glass round coffee table

It's got a gold finish and I LOVE IT in this room. It only took a few minutes to put together: 
Glass and metal round coffee table

They also have a black metal version that's $20 cheaper too! 

I think it's lovely in here. The glass and metal keeps things light and bright: 
Neutral living room with blue accents

It also gives it a more grown up feel too. The table is also a little bigger than what we had before -- 36 inches across. This room can take the bigger size just fine. 

As you can see, I've added circles in other ways in this room as well: 
Round glass coffee table

And of course, if all else fails, you can add some in softer shapes with accessories too. Something as simple as a round lampshade or planter helps to break things up: 
glass round coffee table

I've been sharing this room a lot so far this year -- it's such a light and bright space, and I'm just so thrilled with how it's come together over the past month. I have been working on another project so I'll show you that this week too! No more living room for awhile. ;)

As you can see, I decided to stick with the blue pillows in here for now -- they feel right for the spring and summer (a long way off I know). I think the other ones will work well for the second part of the year. 

I'll leave you with a shot from above with the new table. And a hello from Colby: 
two story living room set up

Do you use round items to break up your decor? They go a long way to soften a room and give it a little more interest!

Affiliate links included for your convenience!

Thursday, February 16, 2017

Chalkboard wall and open shelving in the basement!

I finally got back into the DIY groove again and it feels great! I usually take a minute (or a month. Two.) and give myself a break over the holiday and new year. But when I'm ready to go back at it...I'm ready! 

I wanted to get this project done back before December, but you know how that goes. I was excited to tackle it and yet again was thrilled to work with Minwax on this because I love their products. LOVE! I'm soooo happy with how this came together. It's just like my vision looked in my head. 

We started with a blank wall where our boy's basketball hoop used to be: 
patching holes in wall

You can see that after years of it hanging there it started to dig into the drywall from numerous dunks.  ðŸ˜‰ 

I showed you how we reconfigured the kitchenette in our basement so this area that used to be open below now has cabinets and a wine fridge. 

My first step was to patch those holes. The smaller ones I fixed using this method. The bigger stuff I filled in with putty. Not gonna lie, the final result wasn't perfect because I knew it would be hard to see later anyway. And because I can be crazy impatient. 

But I got them filled and while I waited on the compound to dry, I started marking off where I wanted my lines on the wall: 
How to tape off lines on wall

You can use a laser level for long straight lines, but for a smaller area I prefer a regular level. Just mark your lines with pencil and then you can tape off using that as a guide. 

Our walls are pretty flat so it's not too hard to get a straight line, but I always make sure to push the tape down as much as possible. A flat edge helps a ton:
Making sure painters tape doesn't bleed

I started my four coats of chalkboard paint and because I didn't want to run to the hardware store, I improvised with my paint tray: 
DIY paint tray hack

I do this quite often. :) I grabbed a box that was going to recycling, put a plastic grocery bag over it (make sure any print goes on the opposite side!) and poured my paint in. Works every time. 

After four coats I was able to peel the tape off -- my favorite part -- and look at those lines!:
How to get crisp paint lines

Beautiful! ;) 

While the paint was drying in between coats I started on the wood shelving. The wood was the only thing I had to buy for this project because I had the rest of the materials. I love cheap projects! 

One thing that is helpful when you stain, that I don't think I've told you about, is to open up the wood by wiping it down with a wet rag: 
Popping wood grain with water

This is called "popping" the grain and it allows the stain to really get into the pores of the wood.

I talk a lot about the Minwax prestain conditioner and how important that is too -- I think it's similar to what water does, but the conditioner also helps to even out the wood before staining too:  
Minwax prestain conditioner before staining

You can stain immediately after using the conditioner and it's really easy to apply, so it doesn't take more than a few minutes. 

I went with one of my favorite Minwax stains for this project, Provincial
Minwax Provincial

And with Beauty and the Beast coming out soon, I immediately start singing Belle's song every time I see it. (Cannot wait to see that!) 

I usually use a foam brush for my conditioner, stain and poly application but we were out and again...I didn't want to go anywhere. I didn't want use a good paint brush so I went with a rag, which is always a good option as well:
Staining with a rag

If you use a rag I highly recommend wearing gloves! 

When the stain had dried (I did this project over a few days to allow dry time for the chalkboard paint and stain) I was able to put a coat of polyurethane on: 
Fast drying Minwax polyurethane

I love the Minwax fast drying poly because it really does allow you to move on much faster. Again, I applied it with the rag:
How to apply polyurethane

I love poly because it really brings out the beauty of the stain. 

While that dried I seasoned the chalkboard -- I keep hearing you need to do this and I always have with my boards, but I don't really know if it's helpful or not: 
Seasoning a chalkboard

You just rub the chalk on there sideways and cover the board. It's supposed to make it easier to erase later but who knows. I do it because it just takes a few minutes and I like that it leaves a slightly cloudy, "used" look to the board. 

I hung my shelves with the IKEA Ekby Bjarnum brackets that I had from years ago:
Ikea Ekby Bjarnum shelf brackets

If you use these brackets -- attach them to the ends of your wood first...then hang. Last time I hung one bracket and then put the wood inside and hung the other. WAY more work that way. This time I just put the shelf up against the wall, made sure it was level and then marked my holes for anchors. So much faster!!

I grabbed stuff that we've had in a tray on the counter and started styling. I only purchased the little wood box and a small cutting board -- the rest we had and that's always nice!:
Wood shelves on black wall

We USE most everything on the shelves that that's a bonus too. ;) 

I LOVE how the shelves look against the dark wall!!: 
Wood shelves on black chalkboard wall

I told you here how I think every room needs some black in it and every time I use it I'm reminded of that. I just love the contrast. 

I never wanted to put upper cabinets on these walls because we just don't need that much storage down here. And in our basement with eight foot ceilings I wanted to keep everything as open as possible. It took me awhile to figure out what I wanted to do with this wall because I didn't want to compete (or duplicate) the wood wall I did last year next to it: 
Chalkboard wall with shelving

I shared this photo years ago from Magnolia Homes and it was my inspiration for this project: 
Fixer Upper chalkboard wall

I haven't added anything on the chalkboard yet but we will. I think it will be a fun spot to play around with for parties and holidays. :) 

Next I need to trim out and paint the rest of the cabinets. It shouldn't be TOO bad -- there's really only a few small cabinet doors and then two sides. 

We have a toaster oven and microwave to put out here too, but I'm loving the counters so clean!:
Kitchenette with wood shelves

Chalkboard wall with wood shelves

Here's a better view of the whole thing as it is now. I want to start painting this week and get this whole thing wrapped up!: 
Industrial kitchenette with wood tones

Kitchenette with wood and chalkboard walls

If you have any questions about anything I used, please let me know! This was a simple project that really didn't take long -- the dry time is what you have to wait on. :) 

Here are some more projects from this spot over the years if you'd like to check them out: 

How to stencil a wall

Affordable DIY wood planked wall
Wood planked wall (for cheap!)

Basement kitchenette layout


Monday, February 6, 2017

Pretty DIY centerpieces and tablescapes perfect for spring!

Hello all! Goodness I'm ready for Friday this week! The sun is out, the house is fairly clean (although picked up and clean are two very different things) and I'm ready to relax for a couple days. We're supposed to get snow tomorrow but Sunday looks promising for good, warmer weather! 

I'm in the spring mood so I'm sharing some BEAUTIFUL spring-inspired tablescapes and centerpieces today. I shared our simple green centerpiece earlier this week and it got me thinking about spring/Easter tables. 

Enjoy the pretty inspiration! You can find the link to the talented bloggers under each photo. 

This is just plain stunning. The gold combo with the peach and pink is lovely:  
Pretty spring tablescape with gold, pink and peach

I love these simple farmhouse centerpiece ideas -- the simple box with flowers is so easy for spring: 
Farmhouse spring centerpieces

Table runners are an easy way to add color and texture to your table -- this painted DIY runner is perfect if you have a long table (it's hard to find long runners in the store!):
DIY painted long runner for table

This burlap and lace runner is a simple DIY and would be so pretty for a spring table:
DIY burlap and lace table runner

If you like more COLOR on your table you'll love these next few. These glittered candlesticks are such a cute idea! I love the idea of green, pink and blue for spring:
Pretty DIY glitter candlesticks

I love the darker feel and deeper colors of this centerpiece:
Dark dining room centerpiece

And the bright pink and green combo in this dining room is gorgeous for spring!
Green and pink spring tablescape ideas

This one is just beautiful -- and easier than you'd think. She shares how to get this distressed look on a mason jar:
Painted mason jar centerpiece

And finally, some pretty ideas for my neutral lovers! I LOVE the moss down the middle of this table! I have a thing for moss and the natural touch it brings -- and it looks great with color or neutrals: 
Pretty natural spring tablescape with moss

I love the simplicity of the next few. They are easily replicated at home with trays or wood boxes: 
Tool box centerpiece with greenery

You can't go wrong with mason jars in a wood trough. Ever:
Simple box and mason jar centerpiece

And I'm always a sucker for succulents. See what I did there? You can find these half off at craft stores and they'll last forever -- no watering needed:
DIY succulent and candle centerpiece

I love the touches of pink in this one and how they spill out of the box. They look so real!
Easy succulent centerpiece

There you go! Some beautiful inspiration for your spring table! I'm ready, are you? Have a wonderful weekend my friends!